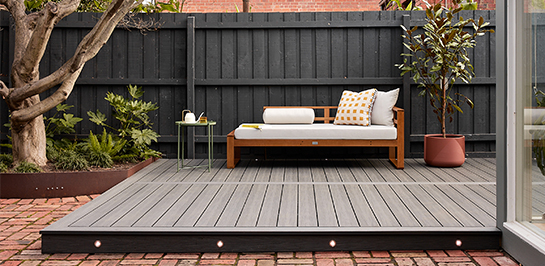
How to make your own Ekodeck Classic edge boards
One of the great characteristics of our Classic range of Ekodeck is its workability.
As Ekodeck Classic is the same colour and consistency all the way through, working the boards is very similar to timber. You can easily cut, rip, plane, route or sand the boards to achieve your desired shape, size and finish.
Unlike our Designer Series range, we do not have designated edge boards available for our Classic range of decking. Instead, you will need to make your own Edge Board to finish your deck for a nice, clean look.
Before you start, you will need some basic tools to complete the job:
- A circular saw with a good quality hardwood or composite blade (60-80 teeth)
- 40g sandpaper
- Clamps
- A straight edge
To begin, clamp your Ekodeck Classic board down on a solid surface, ensuring there is adequate room for a circular saw to pass without hitting the clamps.
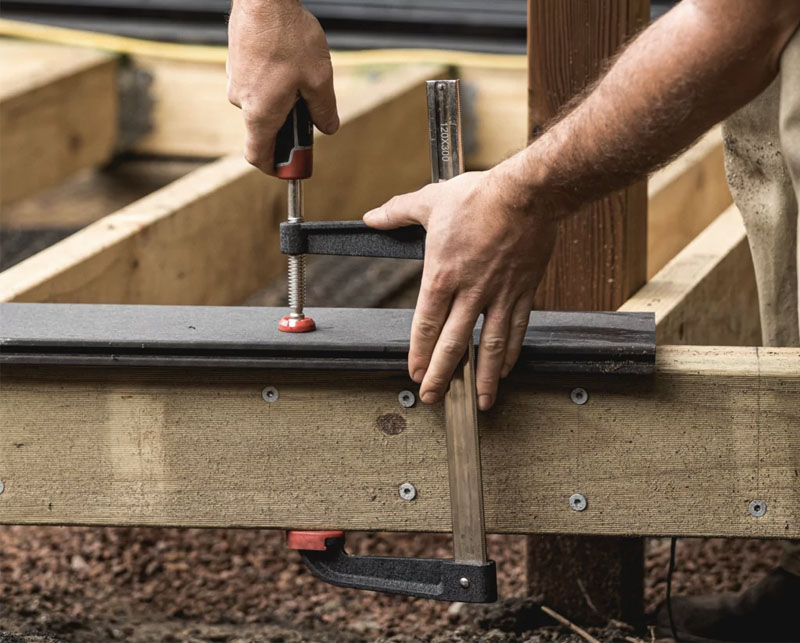
Handy Hint: Utilising your subframe as a workbench is perfect to keep the board level and fully supported!
With your board firmly clamped in place, measure back 10mm from the edge and mark a line to follow. If need be, you can clamp on your straight edge to use as a guide for your saw to ensure you get a clean, straight line.
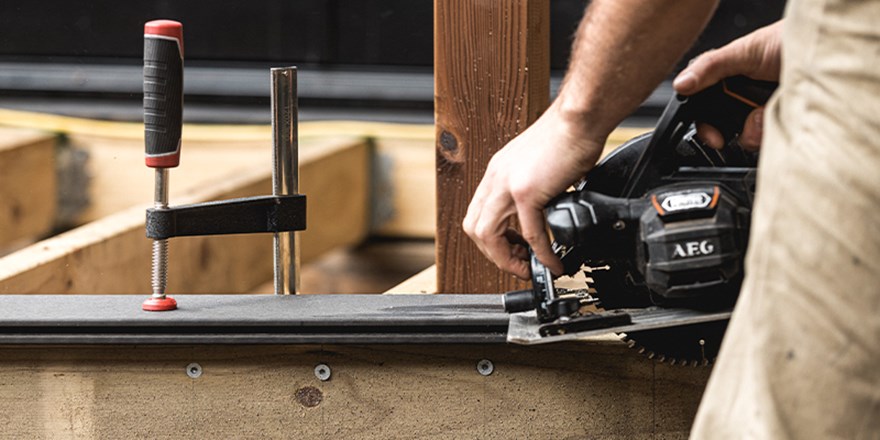
Using your circular saw you can now rip the groove off the board. This will leave you with a square edge to finish your deck.
Handy Hint: For added detail, you can use a router to add a bullnose profile to the board!
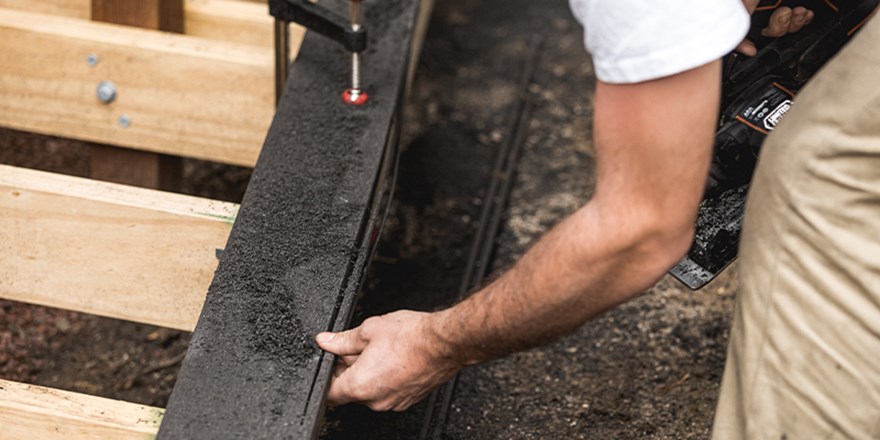
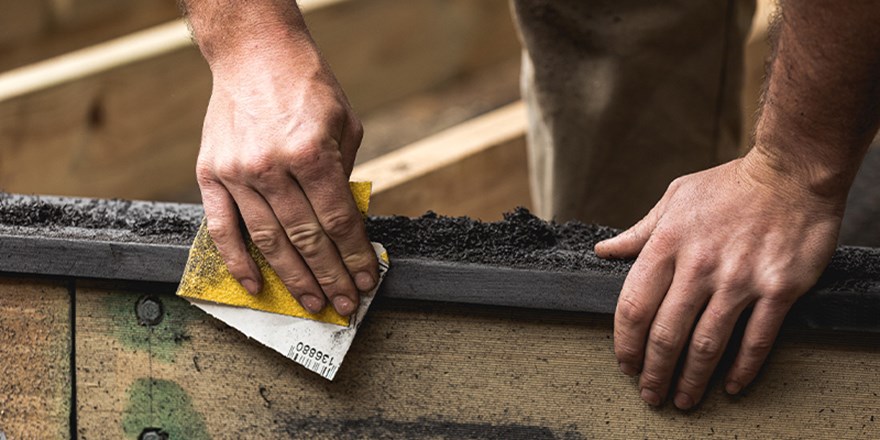
To finish, use your 40g sandpaper to give the ripped edge of the board the same texture as the top. Sand along the grain of the board until you get the finish you’re happy with!
With your Edge Board now made, you’re ready to install your Ekodeck!
There are two ways to fasten the leading edge of your Edge Board. For a concealed look, you can use angle brackets beneath the board. These are a generic angle bracket readily available from Bunnings. Pick a size that best suits your application.
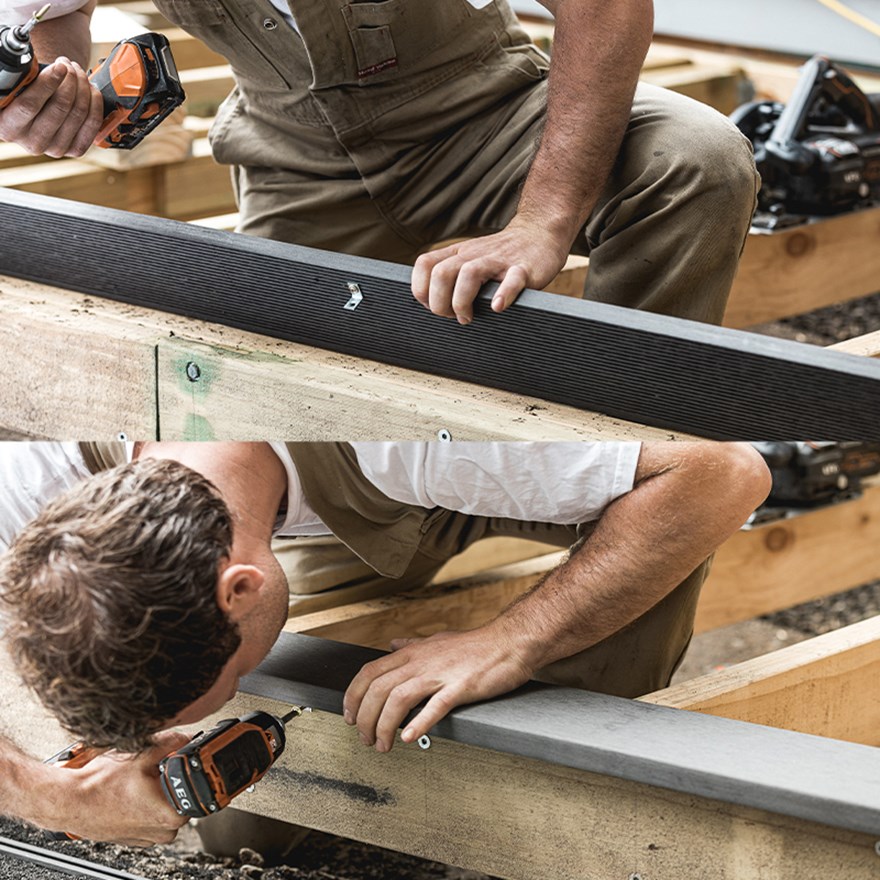
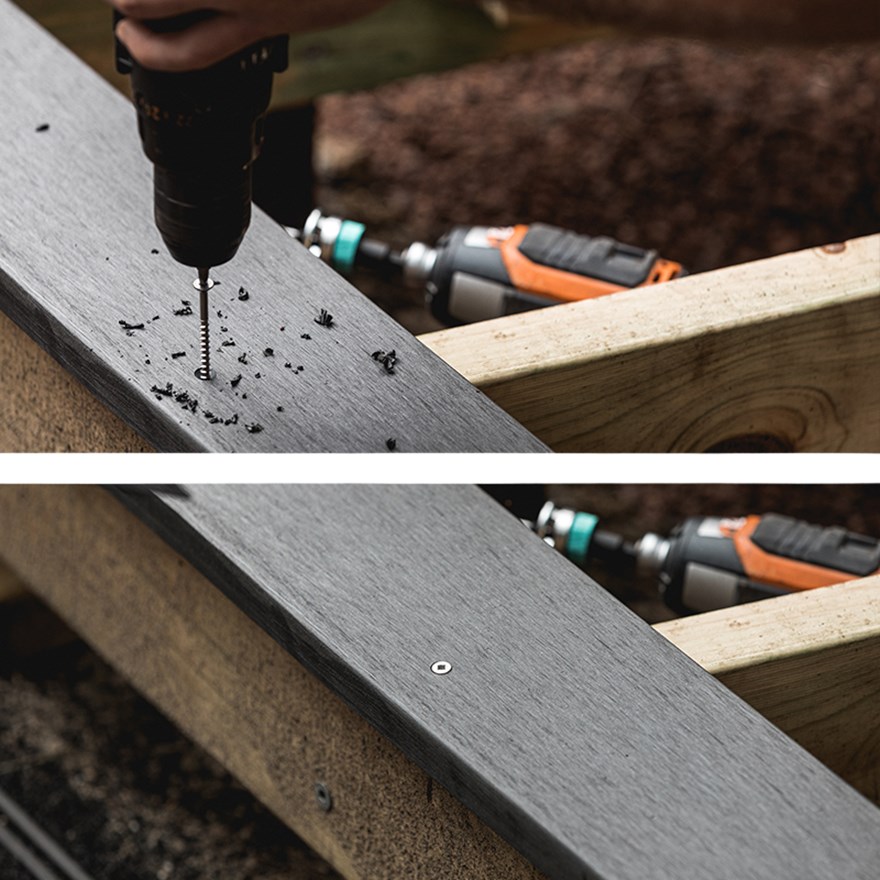
Alternatively, a stronger and simpler method is top-fixing the leading edge of the board. Be sure to predrill an oversize clearance hole and countersink the board. This allows the board to naturally expand and contract without putting undue strain on the shank of the screw. Countersinking is imperative to avoid the board mushrooming over the screw head.
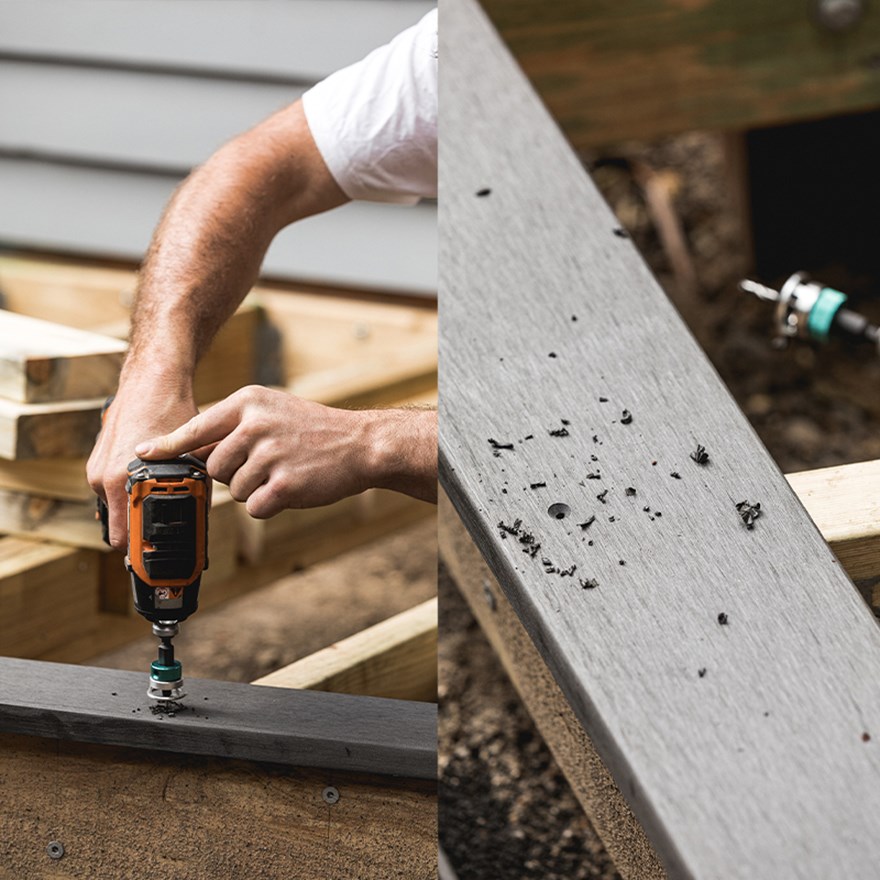
Continue to fasten using 10g stainless steel screws every 450mm. You may wish to source colour-matched fasteners, such as those made by Simpson Strongtie.
With your edge board installed, you can continue to fasten your deck using Quickfix.
If you’ve got any questions, you can reach us at [email protected] or on (03) 9639 7774.
You may also like
Get started with Ekodeck
Experience our entire colour range for yourself. We deliver a sample kit complete with each colour direct to your door.