Wow, day 3 already!
Today’s a big day. Believe it or not, in one day we’ll put down the joist tape and install the vast majority of the deck. Let’s get cracking!
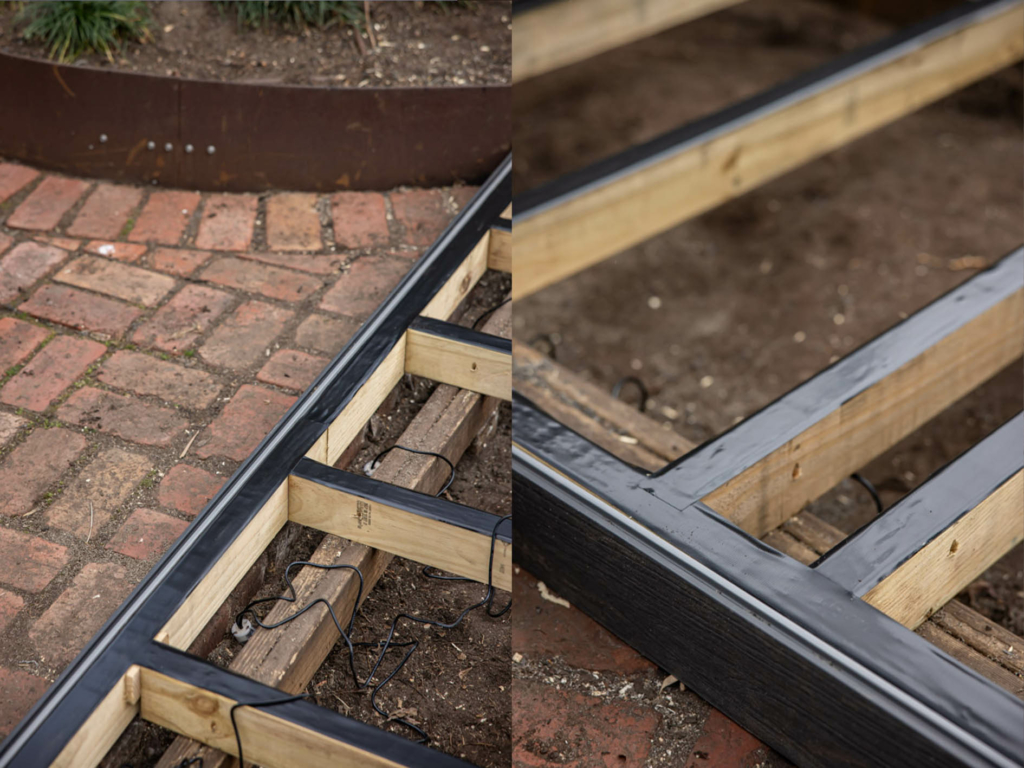
First the joist tape – we used G-Tape which protects the deck from moisture, which is critical. Moisture absorption leads to rot, which is what happened to the original joists. This time around, we’re protecting these babies!
The joist tape is pretty easy to apply, its adhesive (just like sticky tape) and sticks directly on top of the timber joists. Simple as that!
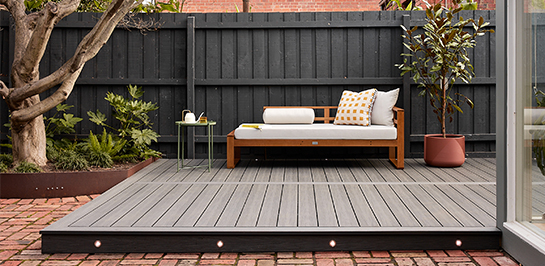
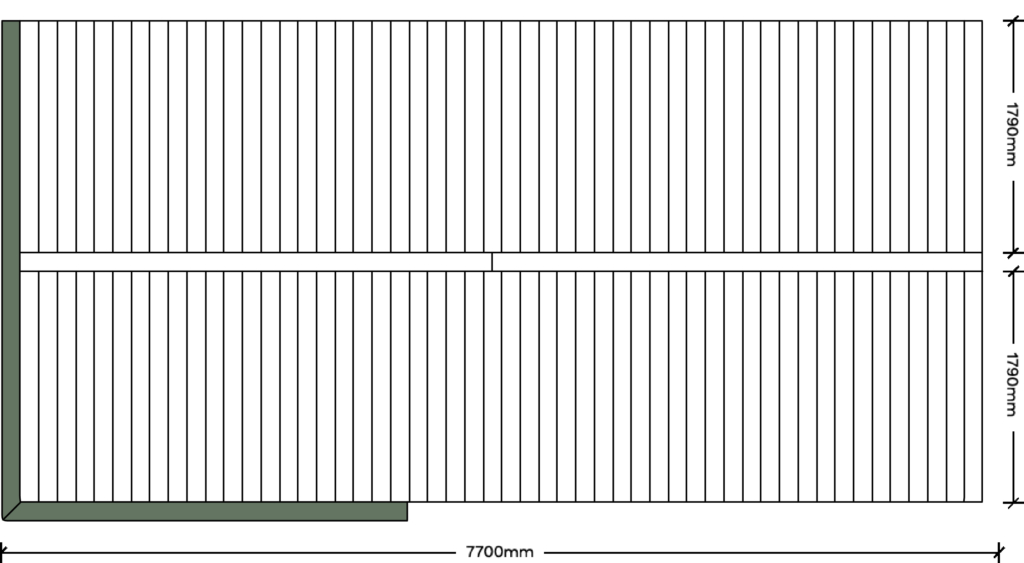
Now for the meat and potatoes – laying the boards! We started with the most seen edge, which is the step on the bottom left of the plan. This has a fascia and Edge Boards creating a picture-frame on these two sides (highlighted in green below).
Generally, it’s a good idea to start at the end of the deck (where your Edge Boards are) and work your way back to the house, where you can rip the last board down to suit.
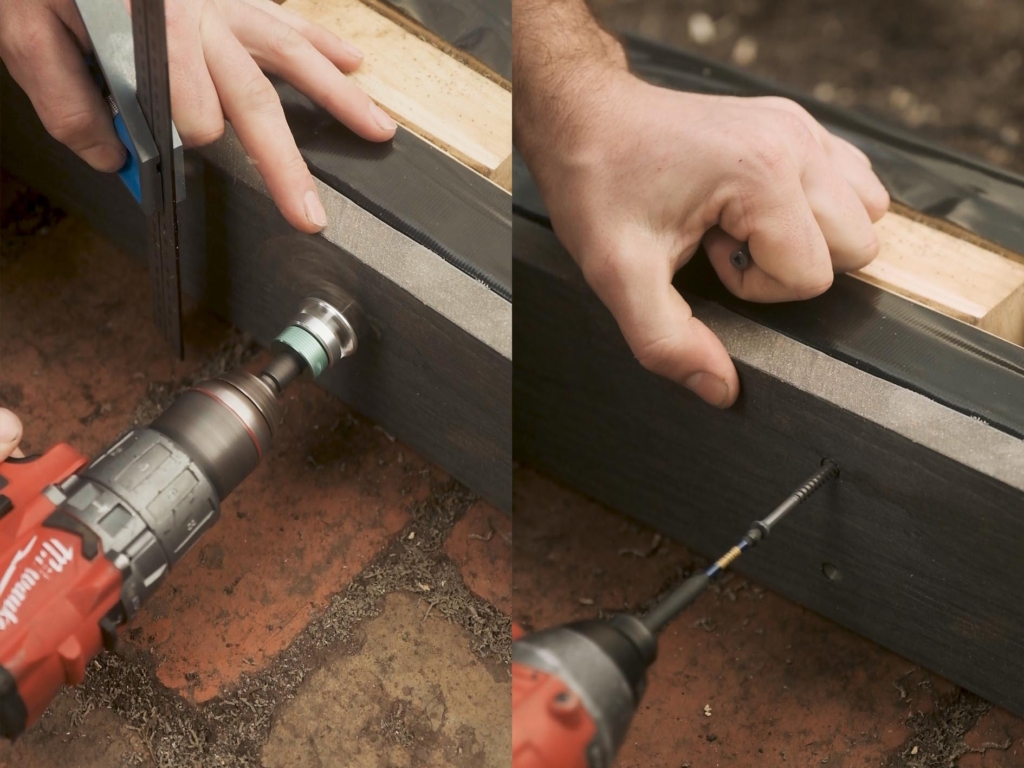
First, we fixed the fascia boards using 10g stainless steel decking screws. Be sure to pre-drill the boards with an oversized clearance hole and countersink prior to fastening. Test on some off-cuts to get the countersink depth you want. (We love a flush finish. What you don’t want is any ‘mushrooming’ – where the deck material comes over the top of the screw. If this happens, you should increase your countersink depth).
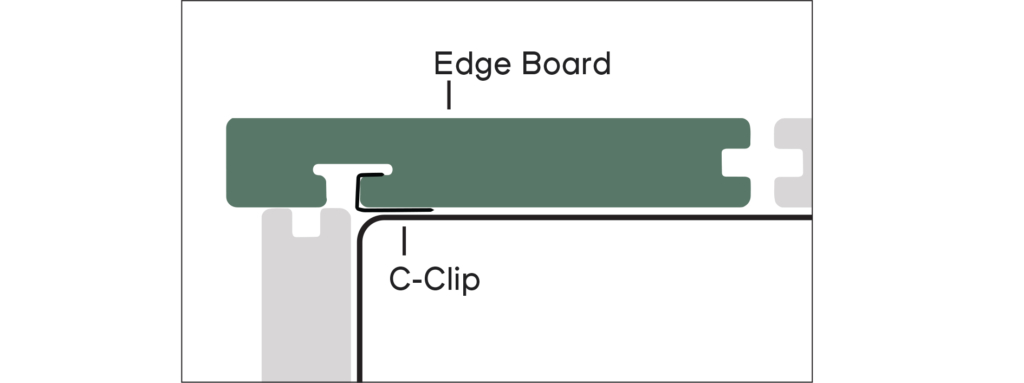
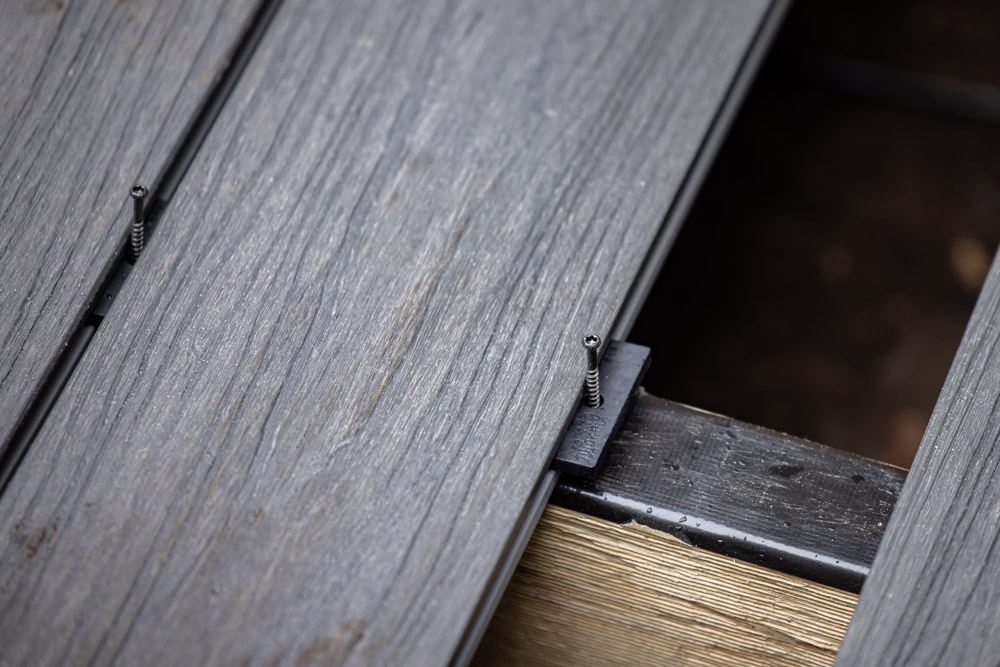
Edge board installation is pretty straight forward. This is easily done by pushing the recess in the bottom of the Edge Boards into the C-Clips. Check out the full step-by-step Edge Board installation video here.
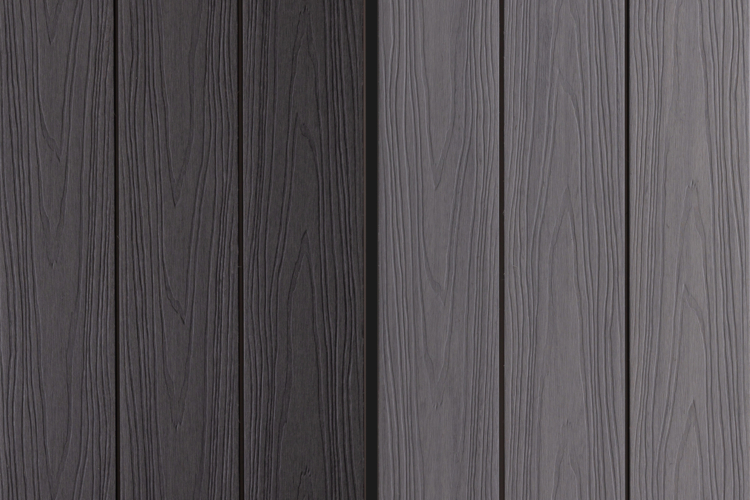
Note: If you’re not using the Designer Series for your decking project, we’ve got articles on how to make you own edge boards for both Ekodeck Classic or Flame Fighter Decking boards, which you can check out!
To install our Edge Boards, we placed them in position and marked the joists. We cut the boards slightly over-length (5-10mm) and cut in our mitre. We find it’s best to keep mitre joins tight to avoid them opening up or coming apart as the boards expand and contract.
Leaving our boards over-length gives us a bit of wiggle room and we can always trim them to length down the track.
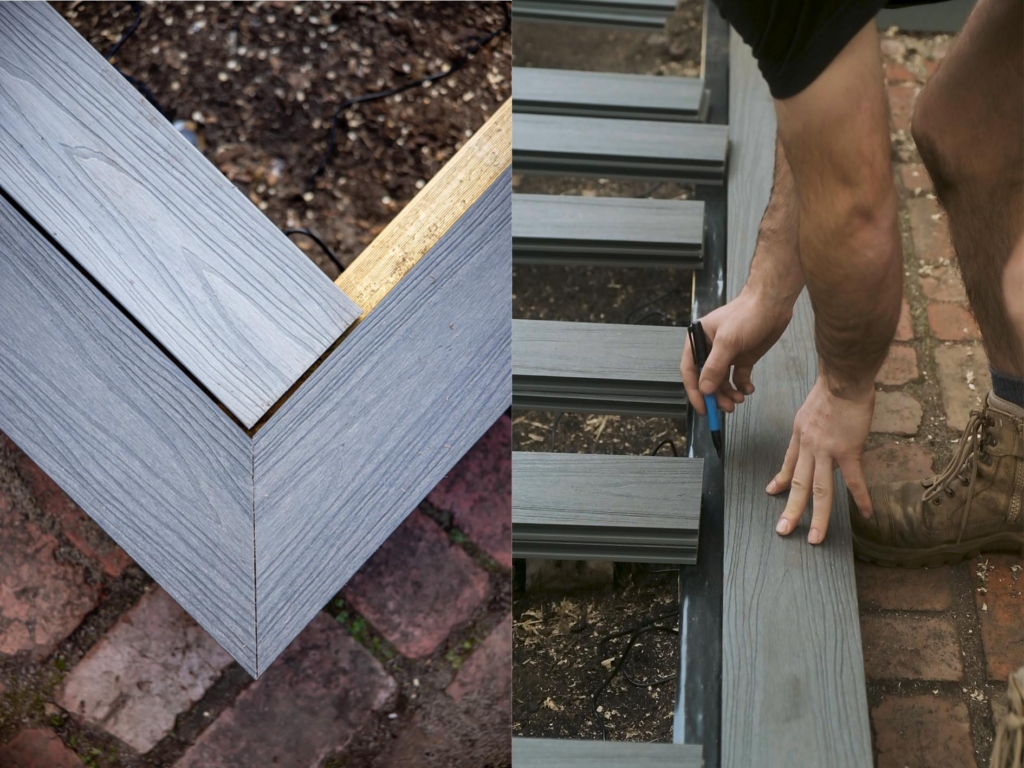
With the joists marked, we removed the Edge Boards and used an off-cut to help us position our C-Clips. We placed the off-cut on our marks we had just made, which allowed us to position the C-Clips where they will sit in the rebate at the bottom of the board.
We spaced our C-Clips every 450mm apart, then continued to install the Edge Boards.
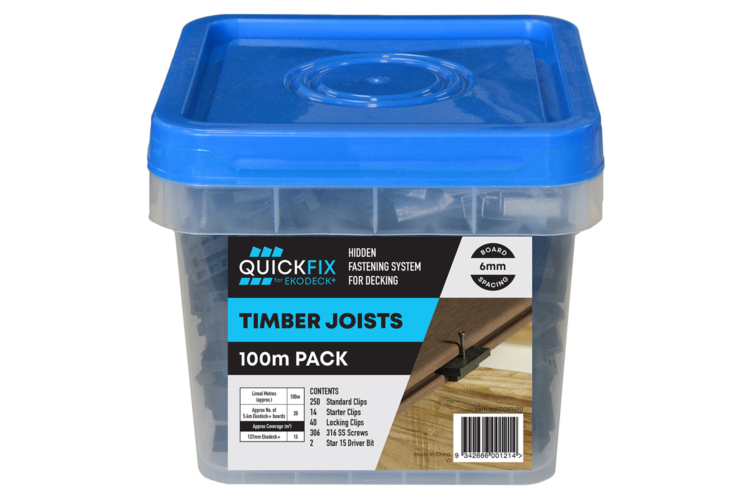
With the Edge Boards now installed, we could move on to the best part – laying the boards! Ekodeck is installed using our concealed fastening clip system, Quickfix. This makes for a quick and easy installation, without any visible screws – and it goes down super fast!
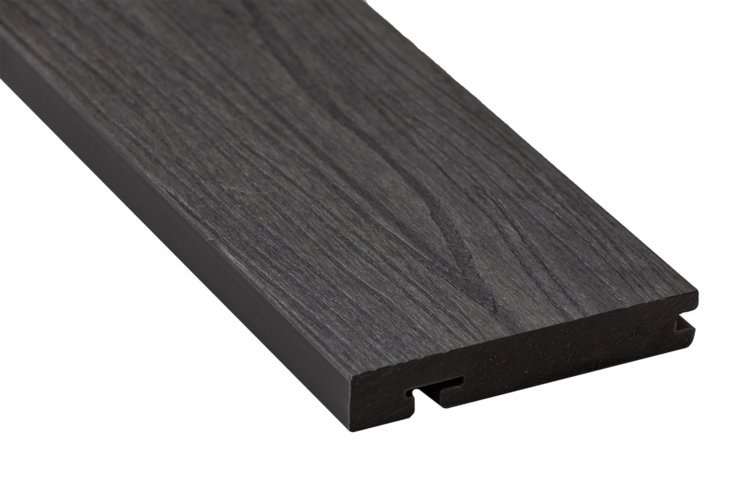
For this project, all our infill decking boards are 1790mm long, so we began by roughly cutting all of our boards to 1800mm, knowing we were able to leave them long then trim them all to length later.
We do this to allow for the natural expansion and contraction of Ekodeck (more information on that here) and because we’ll get cleaner lines and a better result if we trim all the boards in one go – we’ll do this tomorrow.
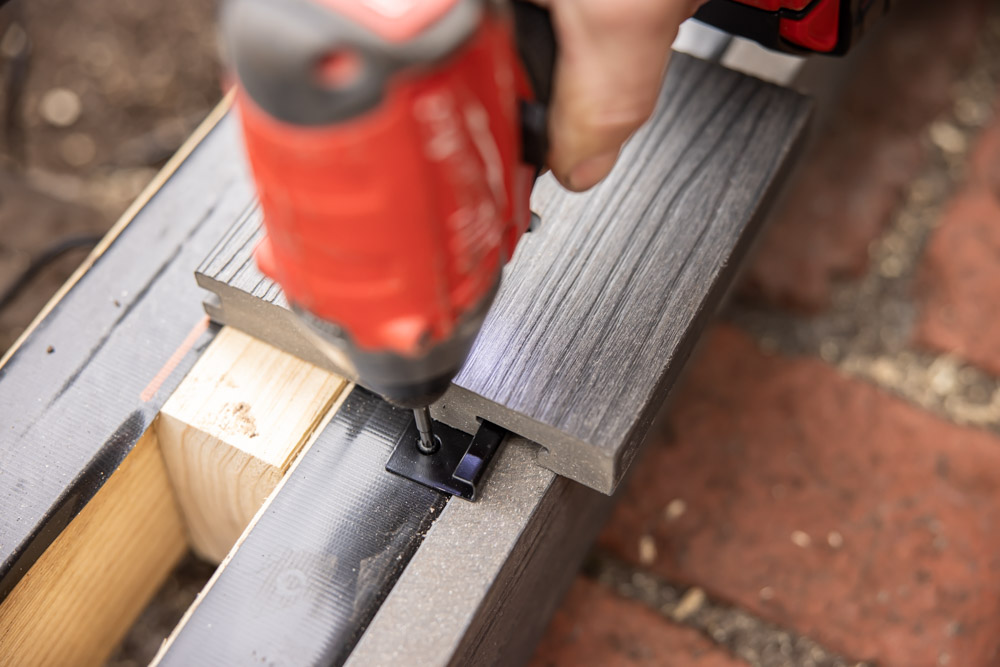
Once we’ve loosely laid out some of our decking boards, we began inserting the Standard Clips and Locking Clips into the groove of the boards.
Place Standard Clips on every joist, except for the centre of each board where we’ll insert a Locking Clip to stop the boards from shifting or coming out of alignment. With the clips in place, push your next Ekodeck board into position – the clips will automatically space the boards. Continue this until you have 6-10 boards all in place with their clips installed.
Standard Clip (6mm Quickfix System) in groove of Ekodeck board. Place on every joist.
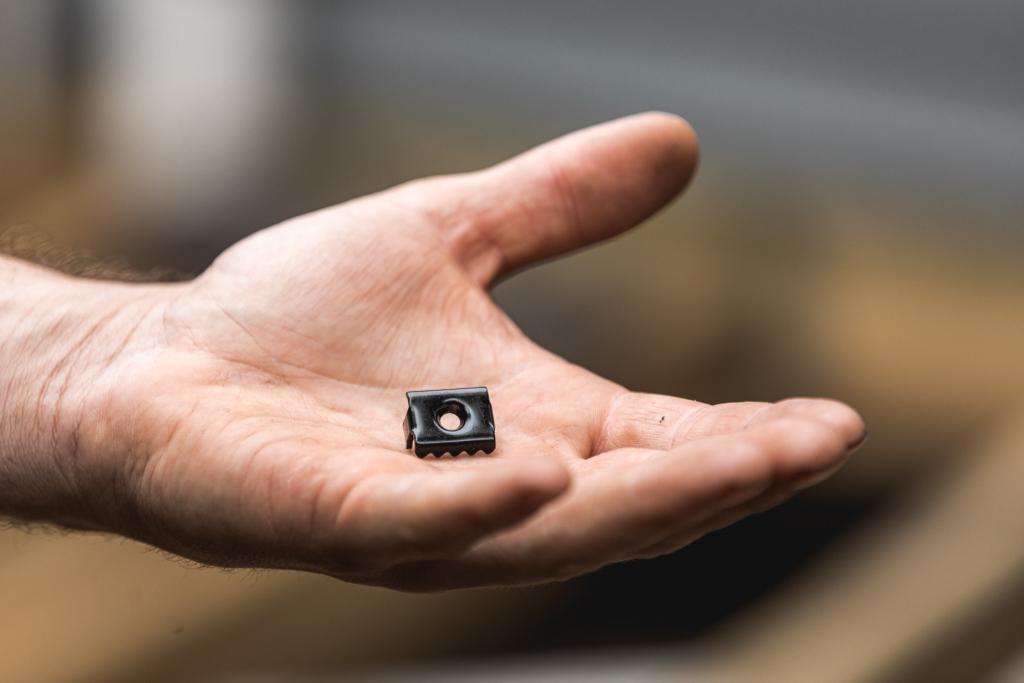
Locking Clip (6mm Quickfix system). Place one per board, nearest the centre.
Now you can screw down the section – it’s good practice to take a couple of measurements out from the first board to ensure you’re running square and parallel. Push the boards together, and using a drill on a low torque setting to do the screws up until they seat firmly in the clips. No need to over tighten the screws – you’ll notice if you do!
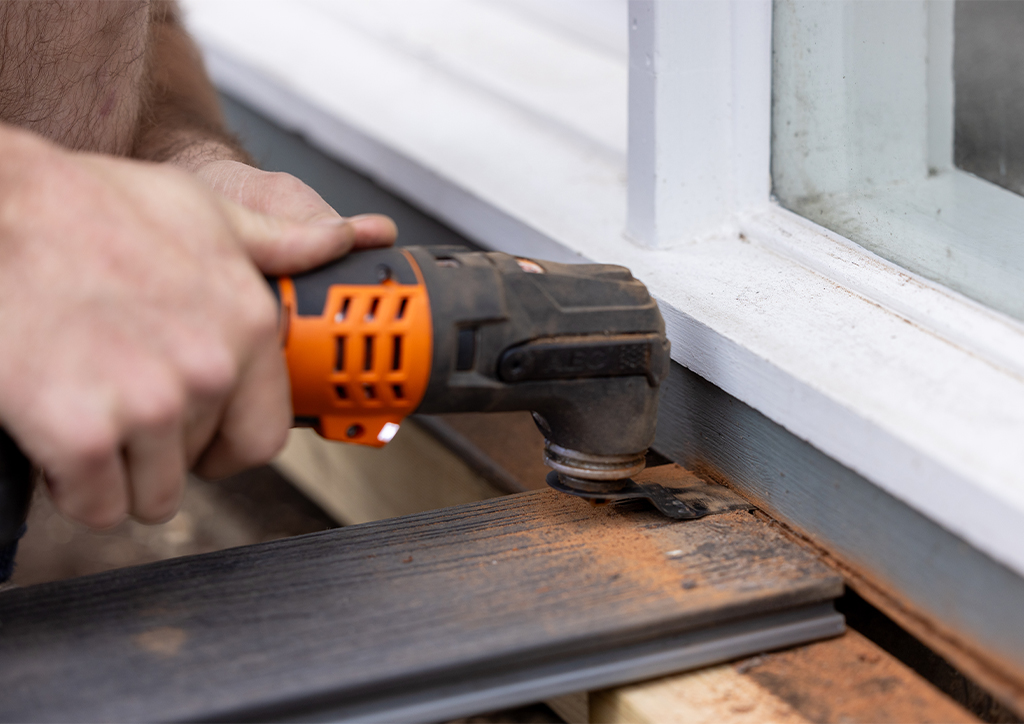
We continued to lay the rest of the decking boards until we got up to the house – as the old timber decking was 19mm thick and our Ekodeck boards are 23mm thick, we needed to make some alterations to the weatherboards on the house to allow us to slide the boards underneath for a clean finish.
To do this, we used an off-cut of Ekodeck to give us our height, and a multi-tool to cut away a few millimetres off the weatherboards. This took a little longer than anticipated, but the clean finish made it worth while!
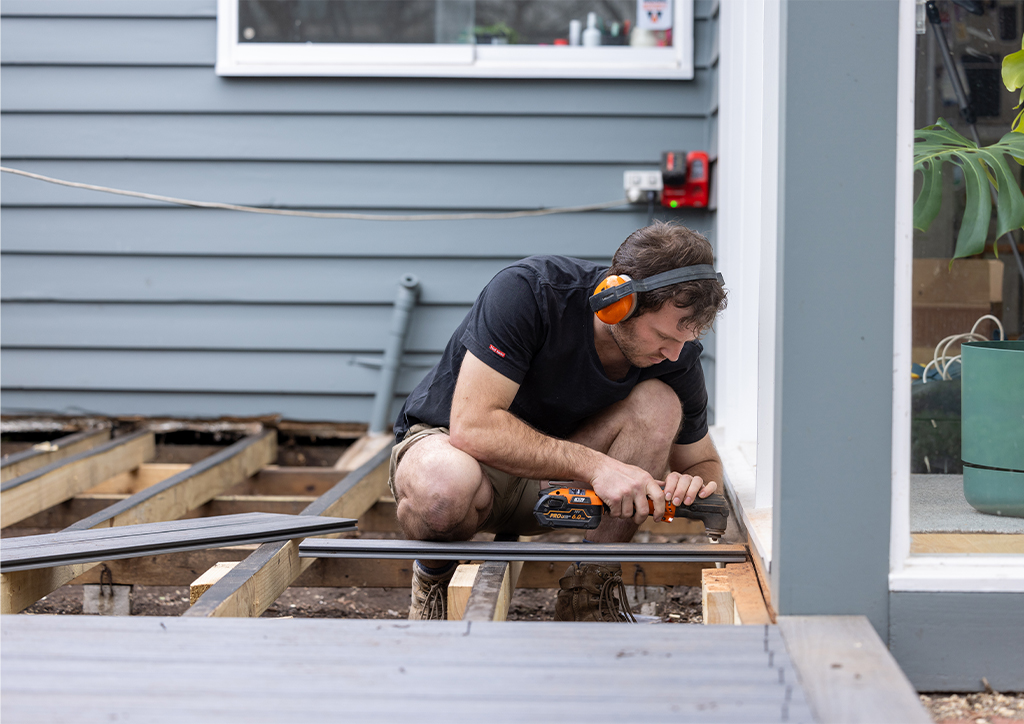
By the end of the day we had all of the decking boards installed except for a couple at the end by the house and the side access-way. As you can see from the photo below, all the boards were left long – these are going to be trimmed to length tomorrow, and then we can drop our breaker board in place.
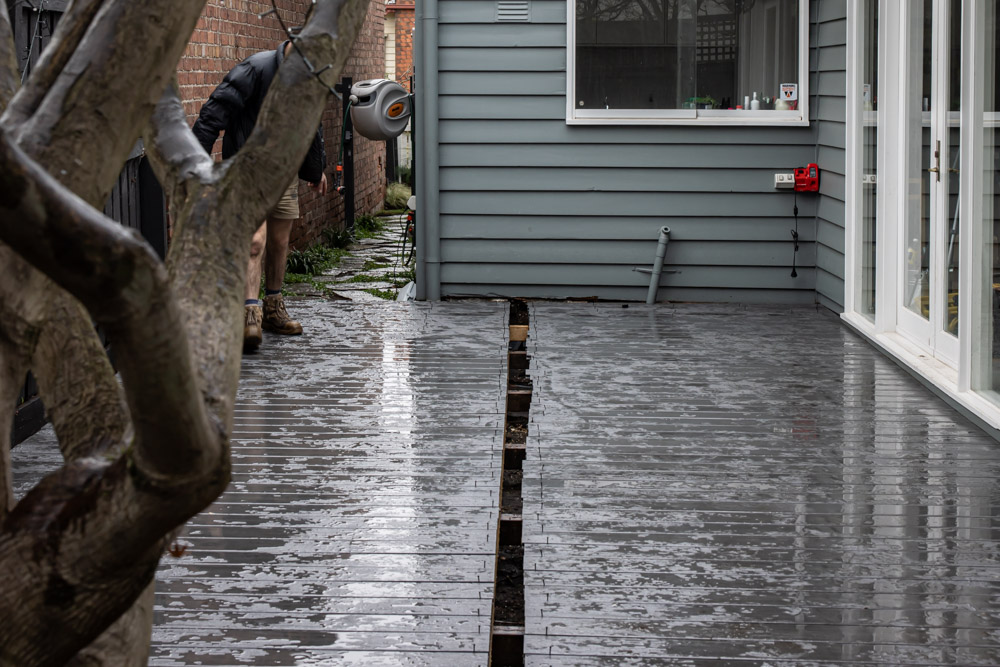
We got rained out at this point of the day, so we called it and decided to start fresh the next morning… The end is in sight!
Products Used

Get started with Ekodeck
Experience our entire colour range for yourself. We deliver a sample kit complete with each colour direct to your door.