When designing your new Ekodeck deck, it’s important to think about how you want the corners and edges of the deck to be finished, as composites may not always be able to be finished exactly like a traditional timber deck.
The main corner finishing options we see are:
- No framing at all
- Fascia boards as the framing
- Heat folded corners
- Picture framing
- Single border
- Herringbone detail
It is also worth noting that depending on which range of Ekodeck decking you’ve chosen, these methods may differ slightly.
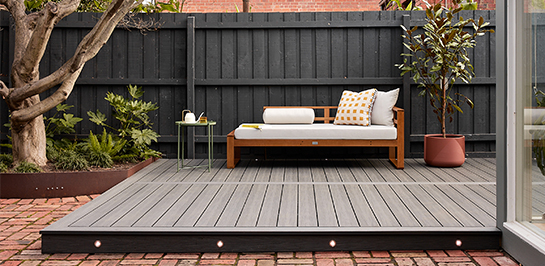
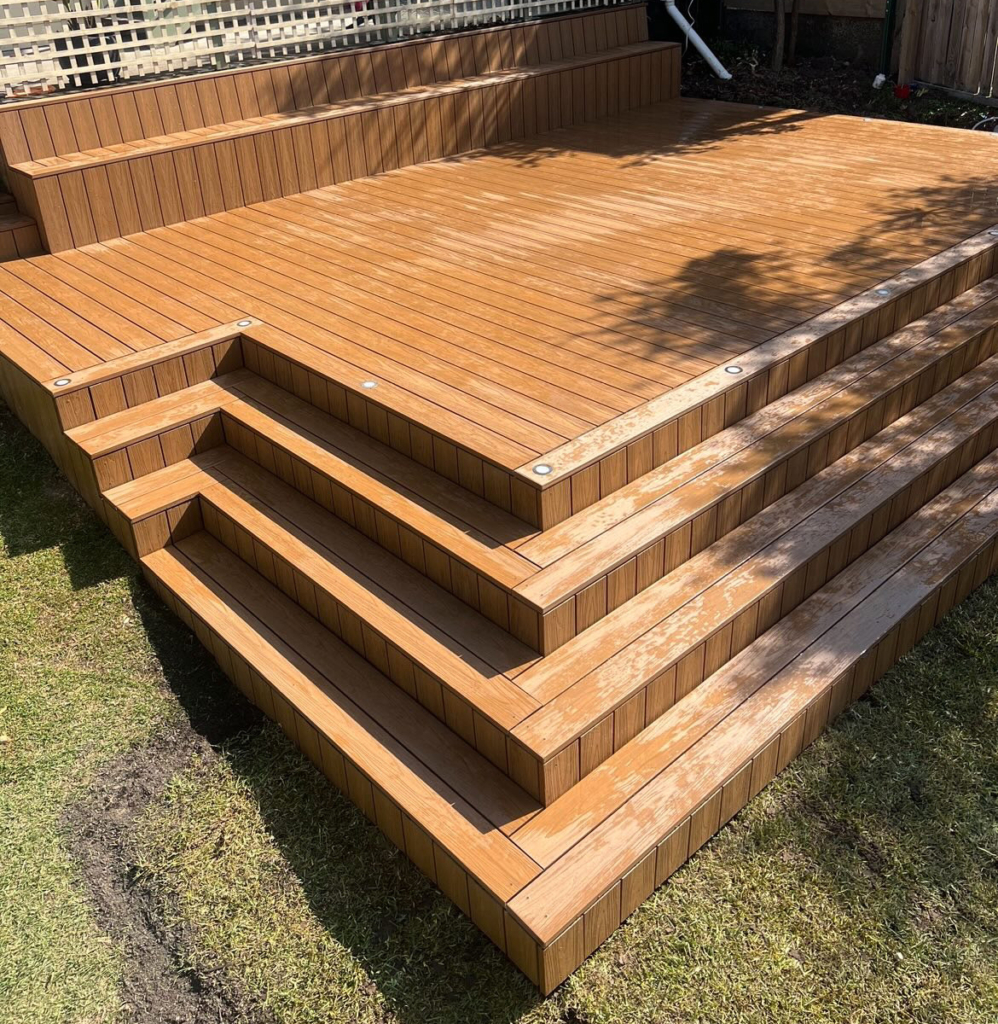
No framing at all
Probably the most common type of corner finishing on Ekodeck decking is actually no framing or fascia board at all – meaning the decking boards just run right up to the edge. This is the most simple and easiest way to finish off your decking. The end-grain of the boards is left exposed, which for some people is something they don’t want to see, however if the deck is running into a garden bed or similar, this generally isn’t an issue and is the best way to finish your deck in this situation.
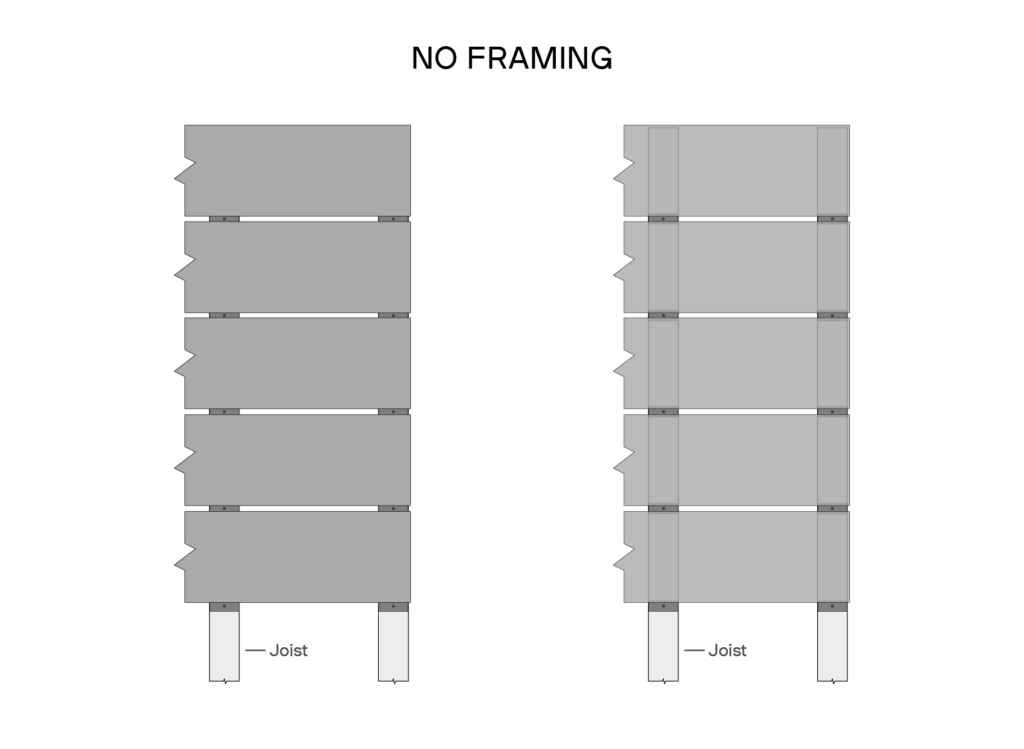
No framing with fascia board
Using a fascia board to frame the deck is a great way to hide the end of the boards so you don’t see the grooves of the profile or cut ends. This is one of the most common ways of finishing the corners and giving a clean overall look to your decking. To do this, the fascia boards are lifted to the same height as the finished decking boards, then fastened off to the frame work every 450mm. Mitring the edge of the fascia boards and keeping them tight is the best way to go to ensure your gaps remain as tight and clean as possible.
Heat-Folding Corners
The biggest issue with mitres is that they tend to open up over time. This is seen with timber decking such as merbau or pine decking, but due to the expansion and contraction along the length of composite decking can be a sticking point for the perfectionist. The team at Top Tier Renovations have recently been using a technique to create a clean and unbroken mitre-joint, which will not have the inherent issues of opening up or coming out of alignment as it utilises one unbroken board.
Check out how it is done below:
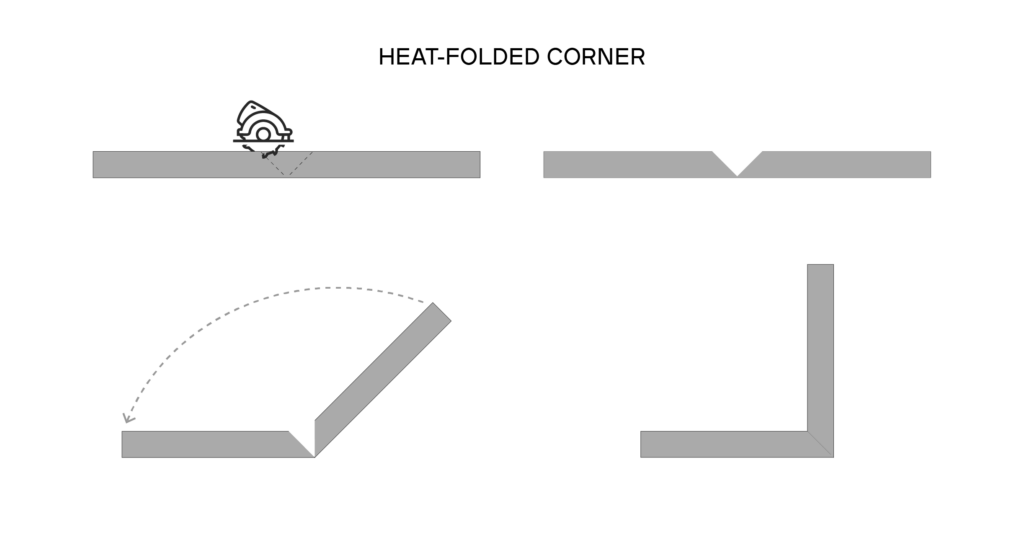
Using the Designer Series Edge Boards, you can make two 45˚ cuts into the back of the board, making sure to keep the top layer of the DurashellTM coating intact. For best results Luke from Top Tier recommends leaving about 1.5mm of the board to allow it to fold but not break. The board is then able to be folded to a right able by heating with a heat gun and glued in place using a 2-part Soudal adhesive (demonstrated below by the team at Top Tier Renovations).
Heat Folded Corners / Waterfall Edge Stair Risers
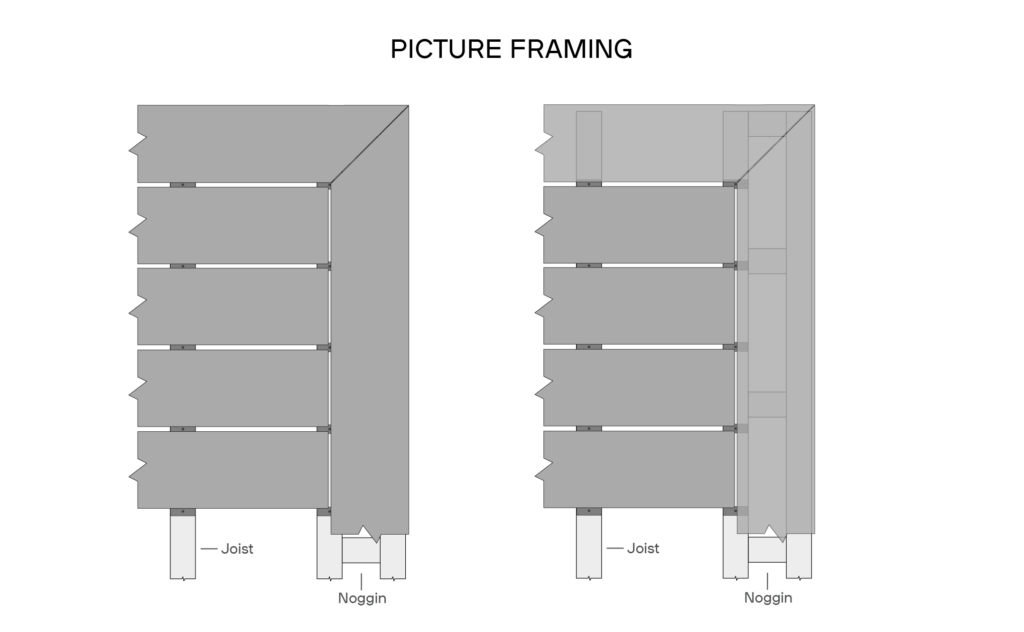
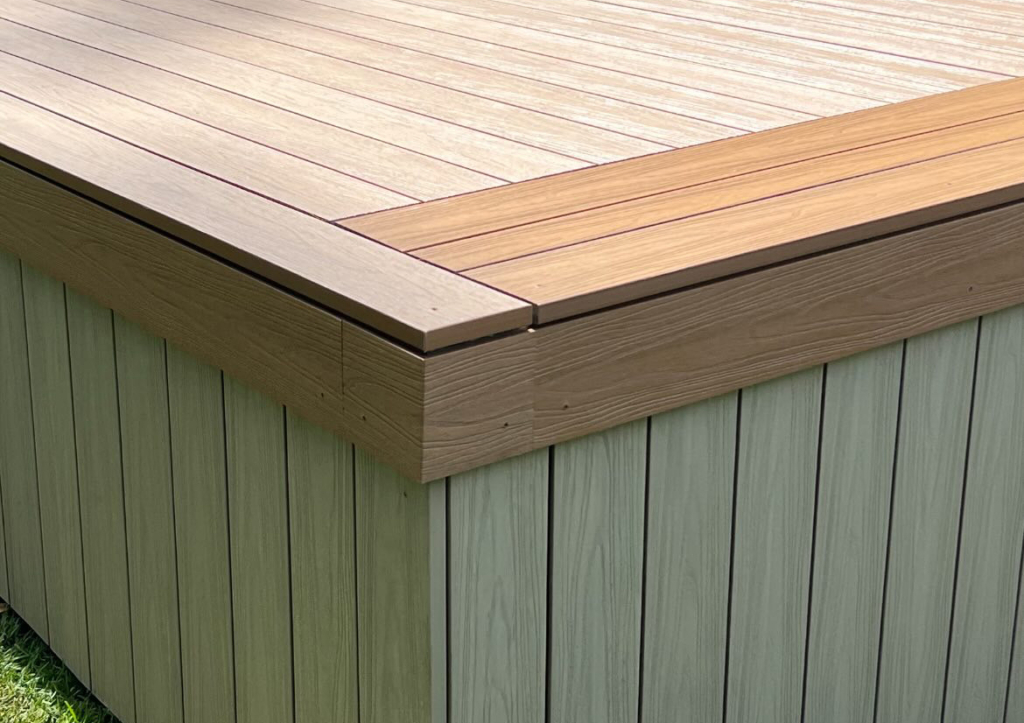
Picture Framing
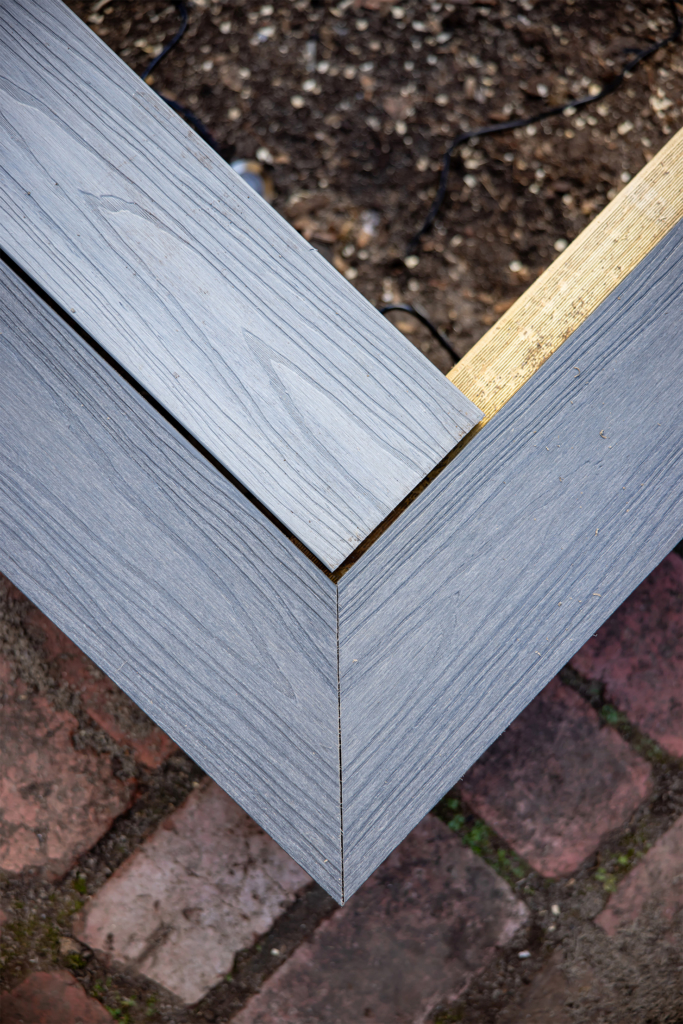
If you’re picture-framing your deck, the most common technique to finish off the corners we see is by using mitre joints – where the two perpendicular boards are cut on a 45˚ angle where they meet, to create a nice, clean corner of your deck.
Generally, you will need to fasten the leading edge of you edge board using either C-Clips or brackets (as mentioned in our Installation Guides).
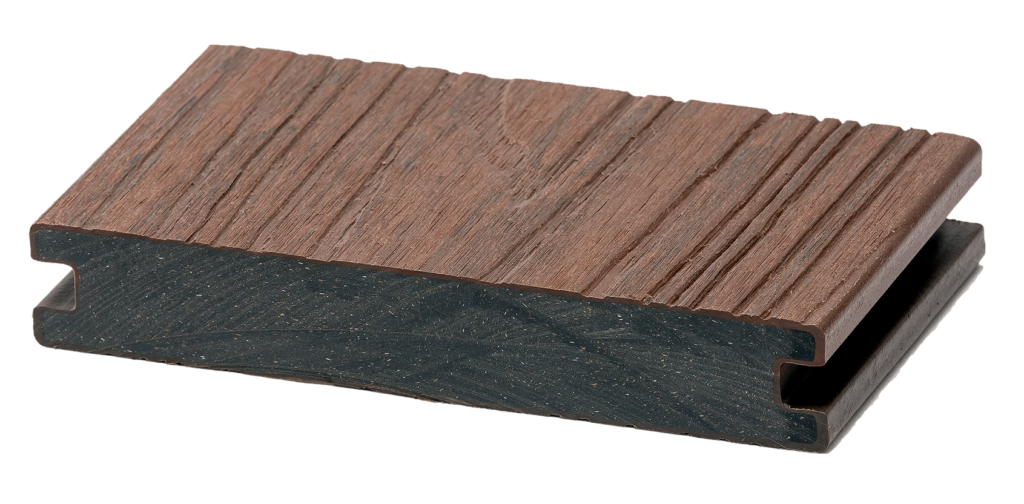
This type of corner finishing is especially useful when installing our Designer Series decking, as the core is a different colour, this helps maintain a consistent look.
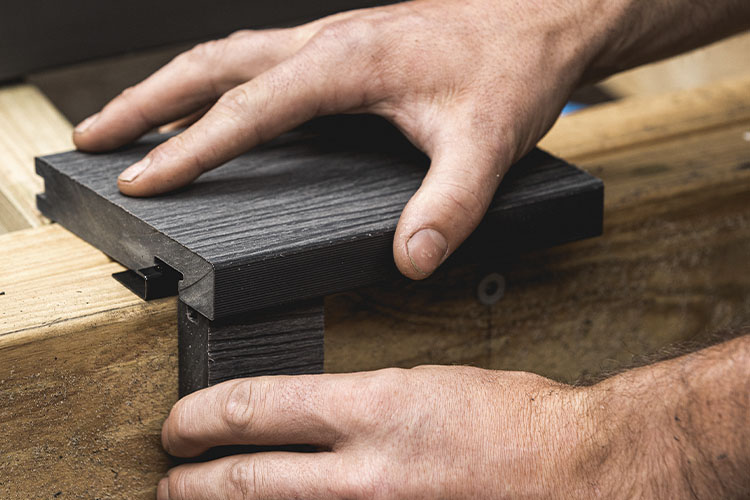
If using Ekodeck Classic boards, you can follow along below to make your own Ekodeck Classic edge board.
Note: when using mitre-joints in Ekodeck, we recommend doing them quite tight to minimise any gapping as the boards expand and contract.
How to make your own Ekodeck Classic edge boards
READ MORE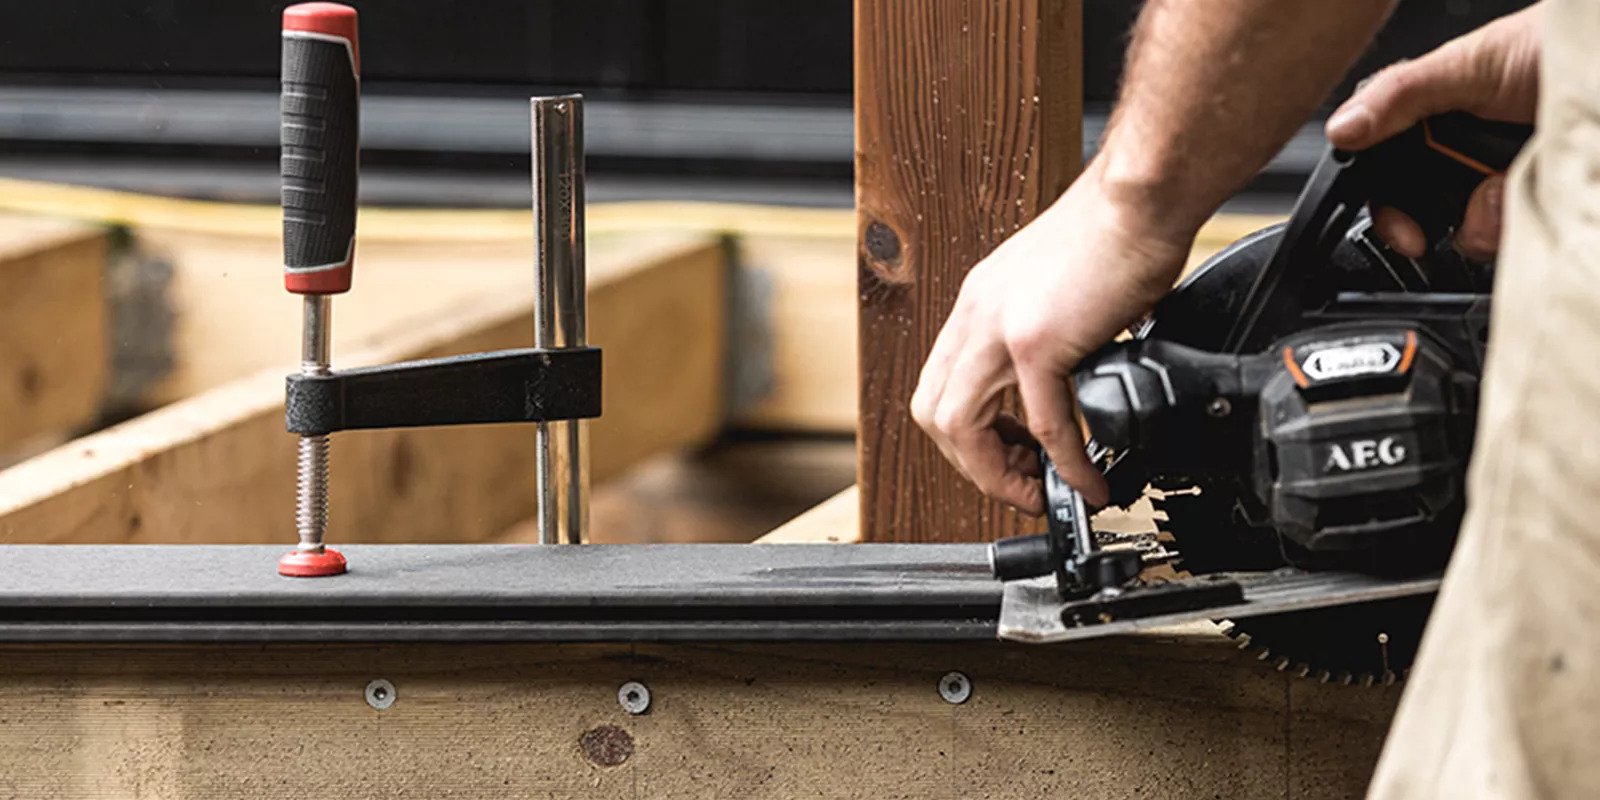
Single Border
Running one side of the framing to the end of the deck, and then butting the rest of the decking boards to that framing board on the side.
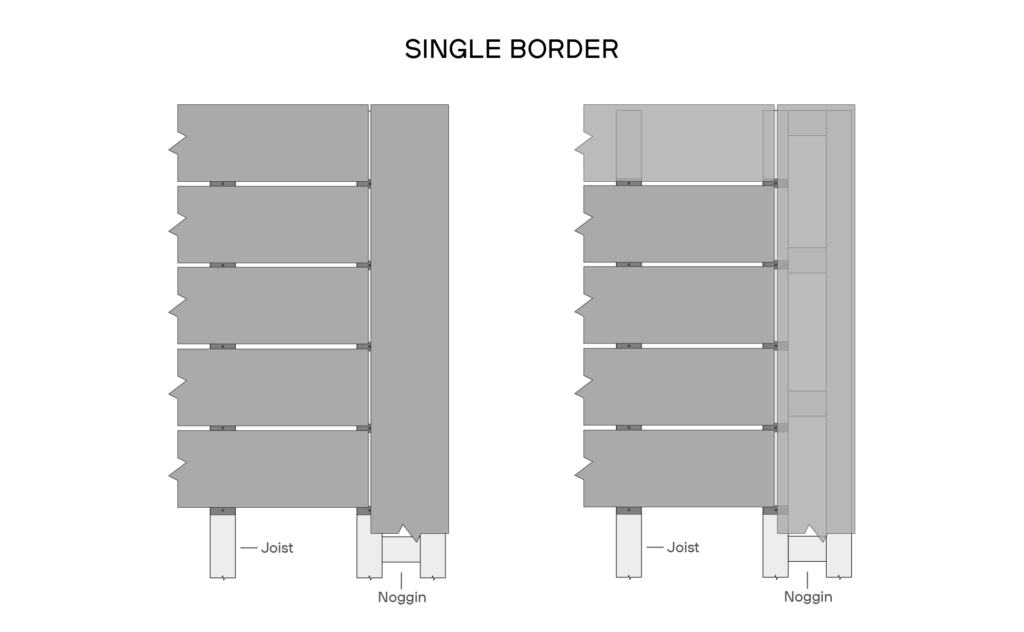
This is generally seen as the best way to manage the natural expansion and contraction of the boards, but, depending on which range of Ekodeck you’ve chosen, you may see the inner core of the boards (for Designer Series and Flame Fighter), or the grooves on the side for the Quickfix clips.
We’ve have seen some regular installers of Ekodeck test out some new and different ways to hide or cover cut ends that can be seen on the edge.
Top Tier Renovations in NSW have been using the Soudal Australia 2C Adhesive and primer to bond the cut off sections of the Edge Boards to the edges of the butt-jointed corners, so that they can get a nice clean corner finish (seen above).
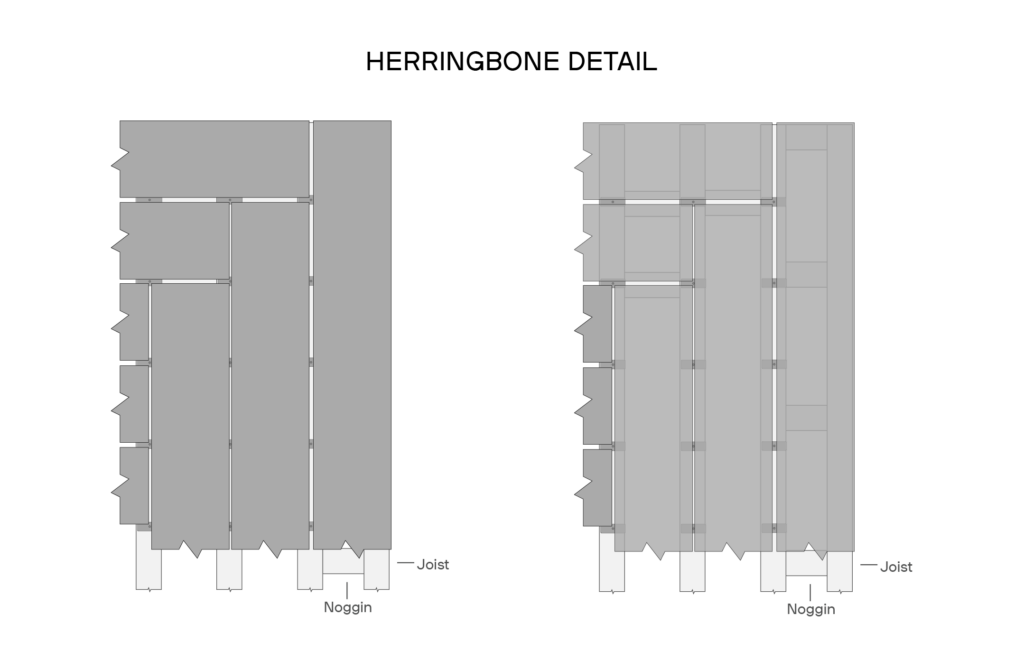
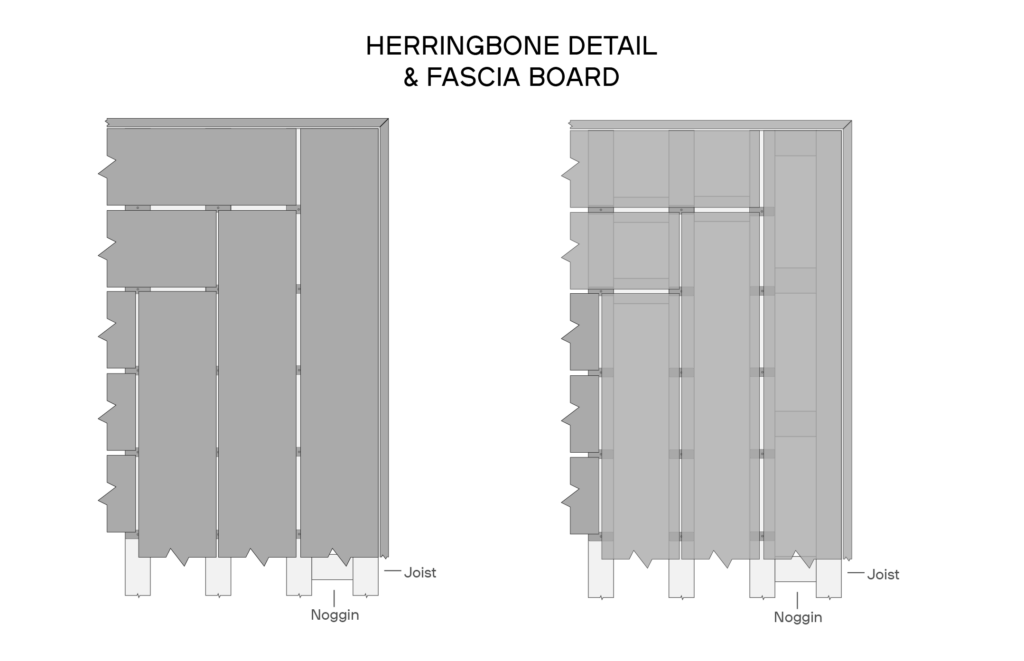
Herringbone Detail
If you’ve got a couple of border boards in addition to your picture-framing, you can create some gorgeous herringbone details in the corners as a feature.
Fascia Boards
In addition to any of the above ways of finishing corners on your Ekodeck, if you’ve got fascia boards around the front/sides of your decking, you can use the fascias as the framing by having the top edge of the fascia board sitting level with the decking.
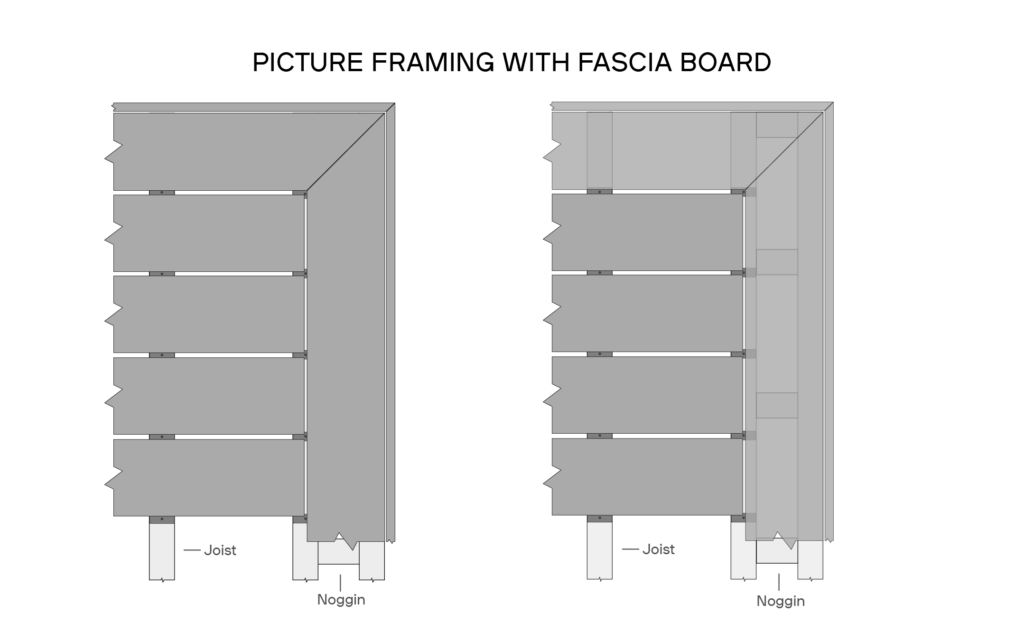

Using fascia boards as the edging in this kind of installation can hide the edges and grooved profile of the board.
Still have questions about installation? Get in touch with us – we’re here to help!
You may also like
Get started with Ekodeck
Experience our entire colour range for yourself. We deliver a sample kit complete with each colour direct to your door.