A strong, level and correctly constructed subframe is the foundation of any great deck. Taking the time to get the structure right will make installing your Ekodeck boards easier and help ensure your finished deck performs as intended for years to come.
We recently built a deck from scratch, including the subframe, so we will run through the key steps involved in constructing a timber deck subframe, from planning your deck layout and installing stumps through to fitting joists and applying joist protection tape.
Check out our how-to video on building a timber subframe for Ekodeck composite decking below.
Please note: This guide provides general installation advice only. Your subframe must be designed and constructed in accordance with the National Construction Code (NCC), Australian Standards as well as local regulations. Always check whether permits or professional advice are required before starting your project.
What you’ll need
The exact materials and tools required will depend on the size and design of your deck, but you’ll typically need the following:
- 90x90mm H4 treated pine for posts/stumps
- 90x45mm H3 treated pine for joists/bearers
- 20kg concrete bags
- Joist & bearer tape
- Circular saw/mitre saw
- Drill driver
- Impact driver
- Tape measure
- String line
- Spirit level
- Square
- 14gx75mm galvanised batten screws
- Ecoseal
- Bitumen paint
- Nail gun (optional)
- Standard PPE (personal protective equipment)
Step 1: Design Your Deck
Before you get started on any of your subframe installation, it is important to work out and design the final layout of your finished deck.
We have a handy Deck Planner which can help you with this, or for more complicated designs, feel free to submit your plans here.

Step 2: Deck Layout
Before you start digging or cutting timber, establish exactly where your finished deck will sit.
Measure out the overall dimensions of the deck and mark the perimeter on the ground. A string line can help establish straight edges and give you a clear reference point while you work.
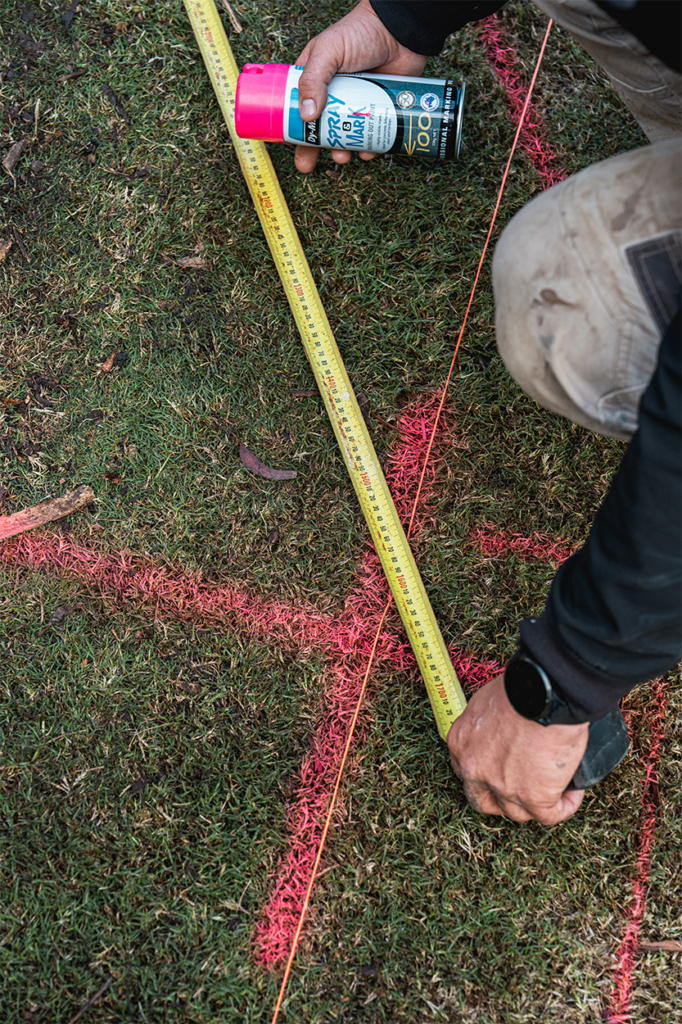
Consider the finished deck height at this stage, including the thickness of the Ekodeck boards (23mm). This allows you to determine the required height of your subframe and ensures the finished deck meets adjoining doors, paths or other surfaces at the intended level.
Take your time here. Accurate measurements and a square layout will make every stage that follows much easier.
Handy Hint: Check your measurements more than once before committing to your layout. Measuring the diagonals between opposite corners is a simple way to check whether a rectangular deck is square.
Step 3: Footing Locations
With the deck marked out, you can establish the locations of your stumps or posts.
The number, size, depth and spacing of your supports will depend on the deck design, ground conditions, timber sizes and applicable building requirements.
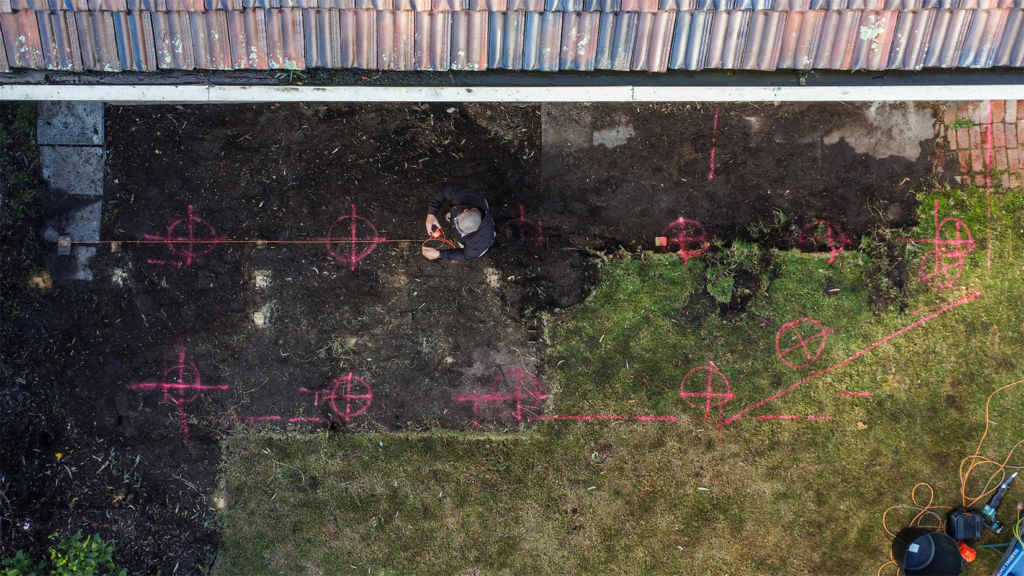
In this case we’re using laminated 90x45mm treated pine for our bearers, which generally have a continuous span of 1.5m – this means we arrange our footings 1.5m apart.
Measure and mark out each location of a stump.
Step 4: Waling Plate
Where the deck connects to the house, a waling plate or ledger may form part of the supporting structure.
Establish the required height using your finished deck level as your reference – using a sample of Ekodeck helps in this step.
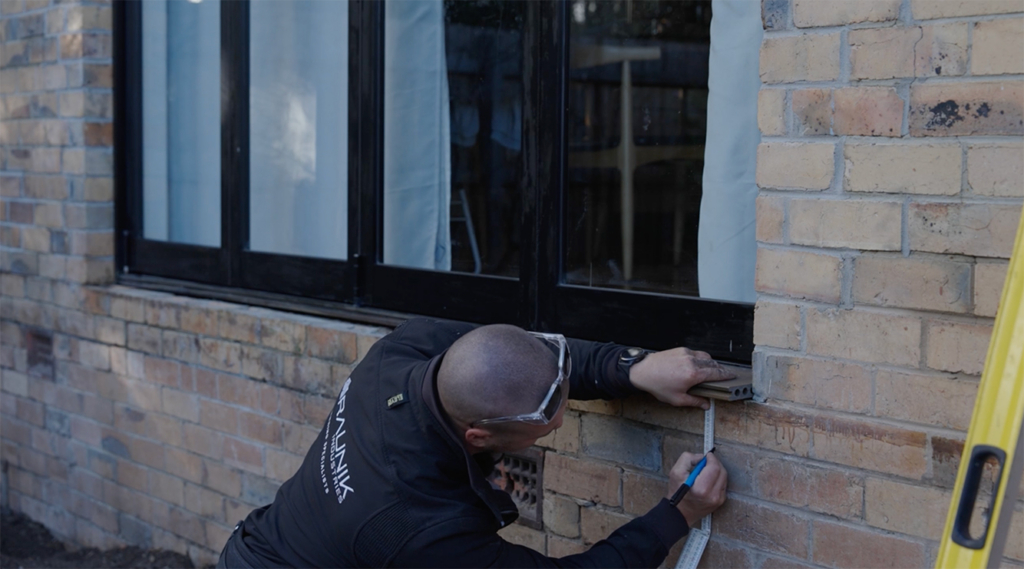
Remember to account for both the depth of the subframe and the thickness of your Ekodeck boards.
Fix the wall plate securely using fixings appropriate for the existing structure and application.

In this installation, we used 10x100mm AnkaScrews to fix the waling plate to the brickwork.
Pay particular attention to moisture management where the deck meets the building. The connection should not compromise existing waterproofing, drainage or termite-management systems.
Step 5: Footing Prep
Dig the required holes – we dug them around 300mm wide and anywhere between 600-900mm deep, until we hit a hard surface.

You’ll then need to work out the length of each post. You can do this by running a spirit level from the top of the waling plate level to where the bearer will be, and then measure down into the hole to get your total depth.

Cut each post to the required length and notch out the top where the bearers will sit on them – we used 90x90mm treated pine posts for this project.

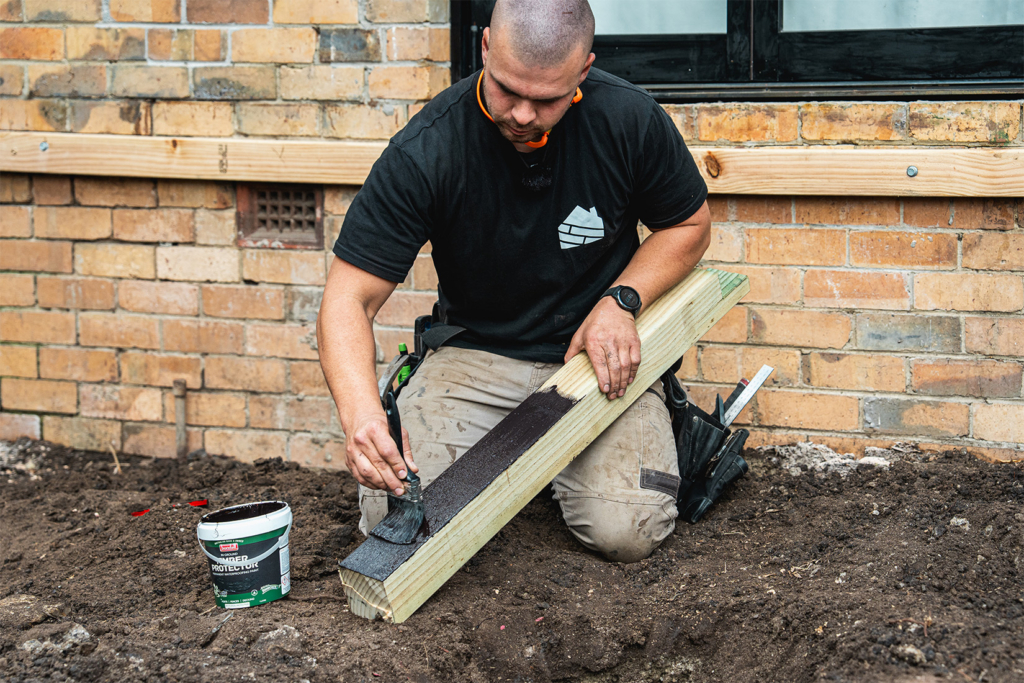
Remember to coat the cuts with Ecoseal to protect the timber and prevent rotting.

We’ll also coat each post in bitumen paint to prolong longevity wherever the posts will sit in the ground – 2 coats are ideal.
Position each post to ensure they’re plumb and brace using some timber offcuts then screw into place.
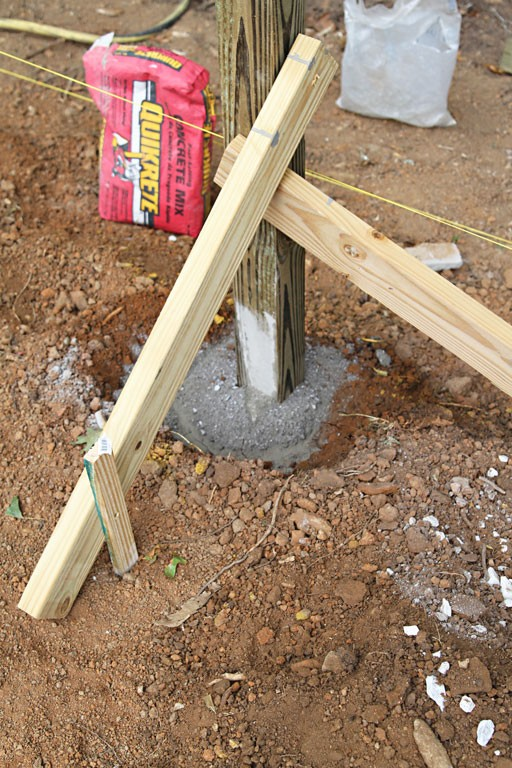
Pour in your concrete – we allowed for 2 x 20kgs bag for each hole.
Once poured in, grab a shovel and make sure that the concrete wraps around all sides of the posts.

Allow the concrete to cure before installing the bearers.
Once the concrete has cured, backfill the rest of the holes using some soil so that water doesn’t pool in the hole.
Step 6: Build Bearers
Once the posts are ready, the main bearers can be installed.
First, since we decided to use laminated 90x45mm treated pine for the bearers, we need to laminate all the bearers together – this means we need to fix two lengths together using a nail gun.

Ensure that you’re fixing the nails on an angle so that they don’t easily pull apart.
Step 7: Install Bearers
Position your bearers over the posts according to your subframe design.
Check each bearer for level as you work. It’s also worth looking along the length of the timber for bows or crowns before fixing it into position.
Secure the bearers using appropriate structural fixings and continue checking the structure for level and alignment – we used 14g x 75mm galvanised batten screws.

A little extra time spent getting the bearers right will pay off when it’s time to install the joists and decking.
Handy Hint: Leave your bearers over-length and cut them down once you’ve installed the picture frame joists – this ensures that you cut your bearers to the exact length you need.
Step 8: Apply Bearer Protection Tape
When using timber for your subframe, it is recommended to use a joist/bearer protection tape to extend the life of the timber, especially if you’re using a composite decking material like Ekodeck which comes with up-to 30 years warranty.

For the bearers, we used G-Tape 100mm x 20m Tape.
Step 9: Picture Frame Border
If your deck design includes a picture frame border, the subframe needs to be planned accordingly. The perimeter decking boards run in a different direction to the main decking boards, so additional joists and blocking are required to provide adequate support and fixing points.
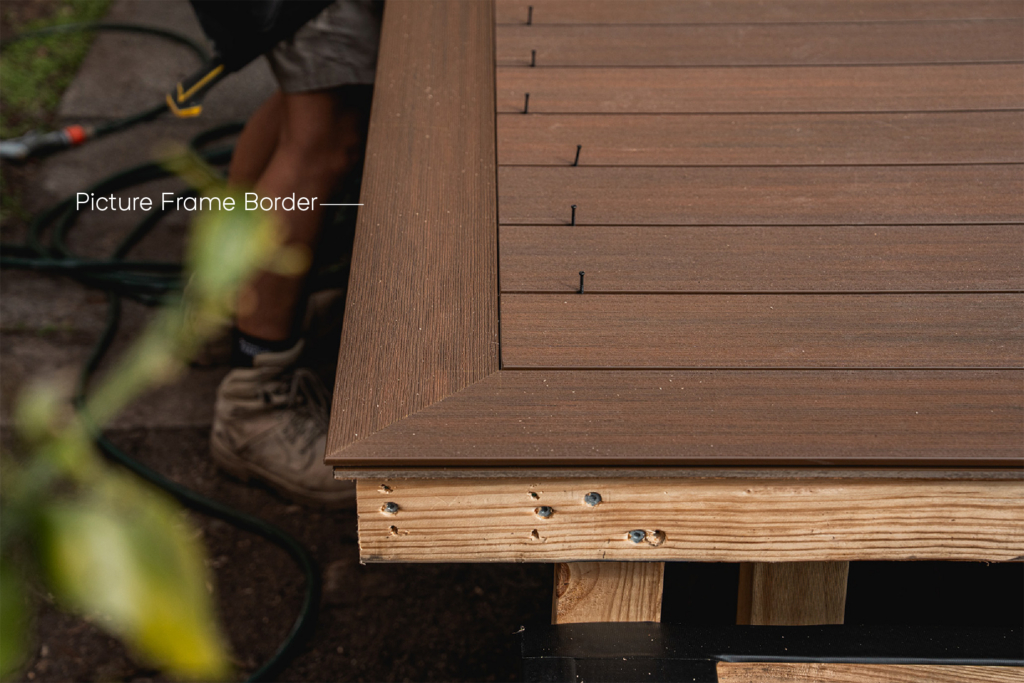
Start by determining where the inside edge of your picture frame board will sit. Install an additional joist parallel to the outside perimeter joist, positioned so that both the picture frame board and the ends of the main decking boards have their own suitable fixing points.
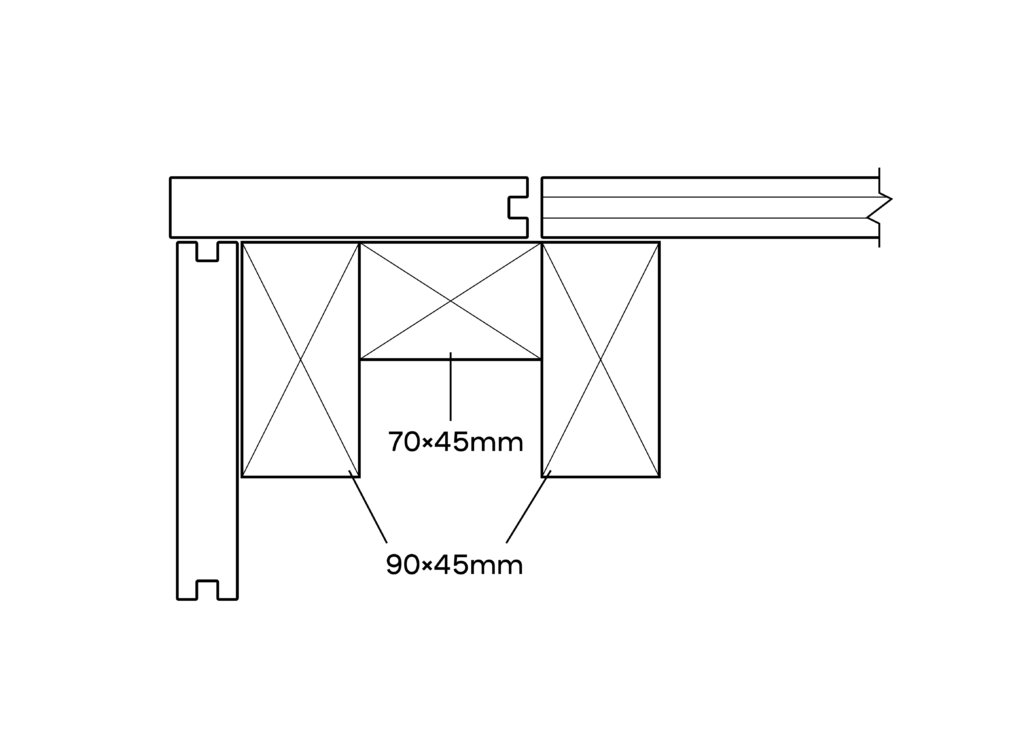
We used 90x45mm treated pine for the joists.
Add blocking or noggins between the perimeter and inner joists to strengthen the assembly, spaced at your joist spacings – we used 70x45mm treated pine for the noggins, since we will have about a 25mm overhang.
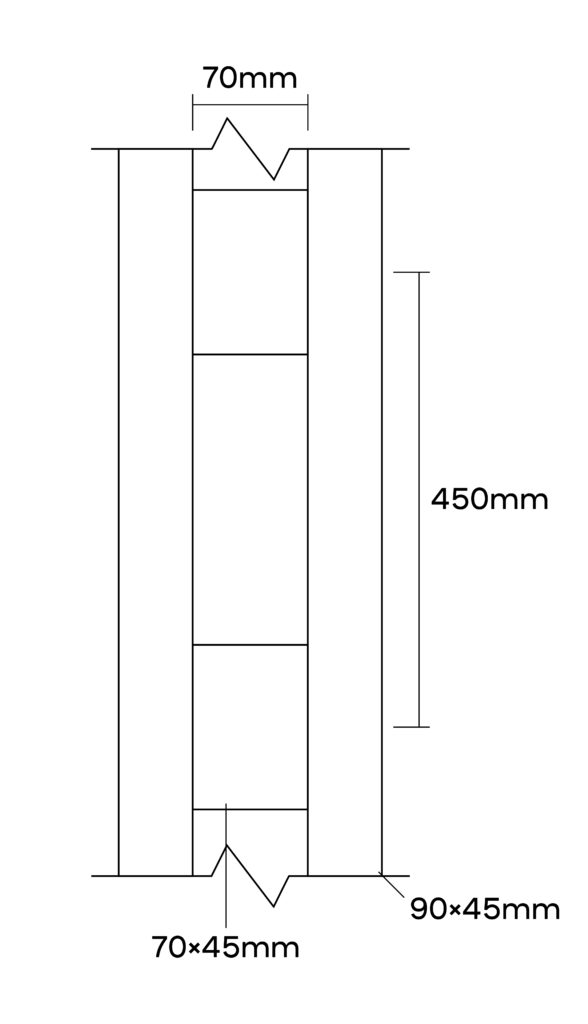
This creates a ladder frame for the edge boards to sit on.
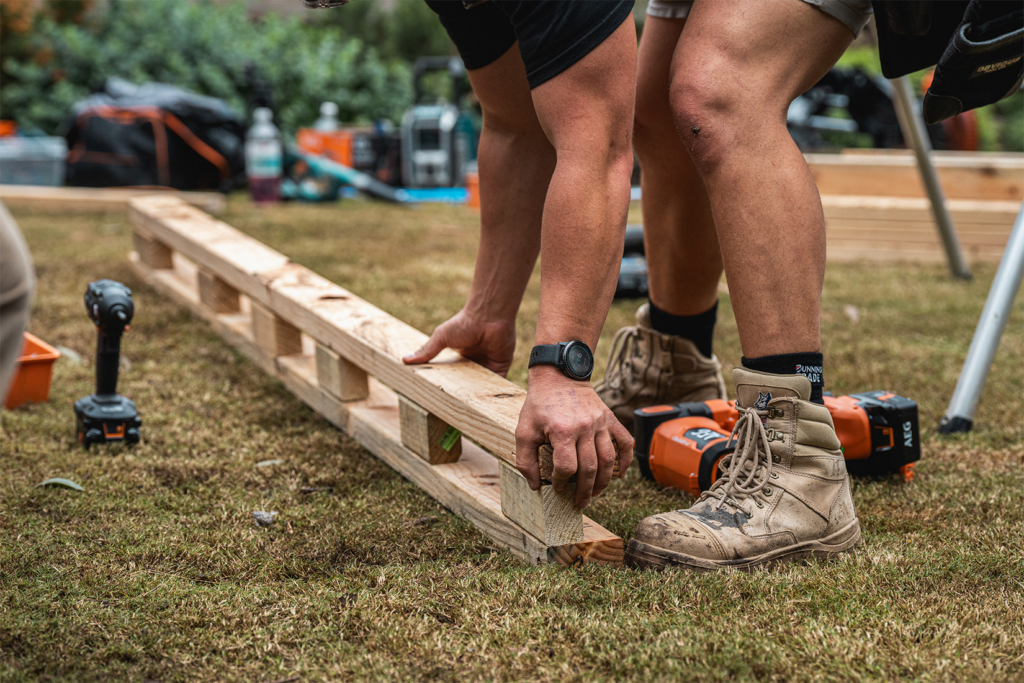
Continue this framing around each side of the deck where the picture frame border will be installed perpendicular to the rest of the decking boards.

Once your border joists are installed, you can now trim down your bearers to size.

Step 10: Breaker Board Frame
Next, a similar ladder frame is installed anywhere you have a breaker board.
Again, we’re using 90x45mm treated pine joists, and some 90x45mm noggins cut to the width of your decking board – in our case, since we used Ekodeck Essentials Decking, 137mm.
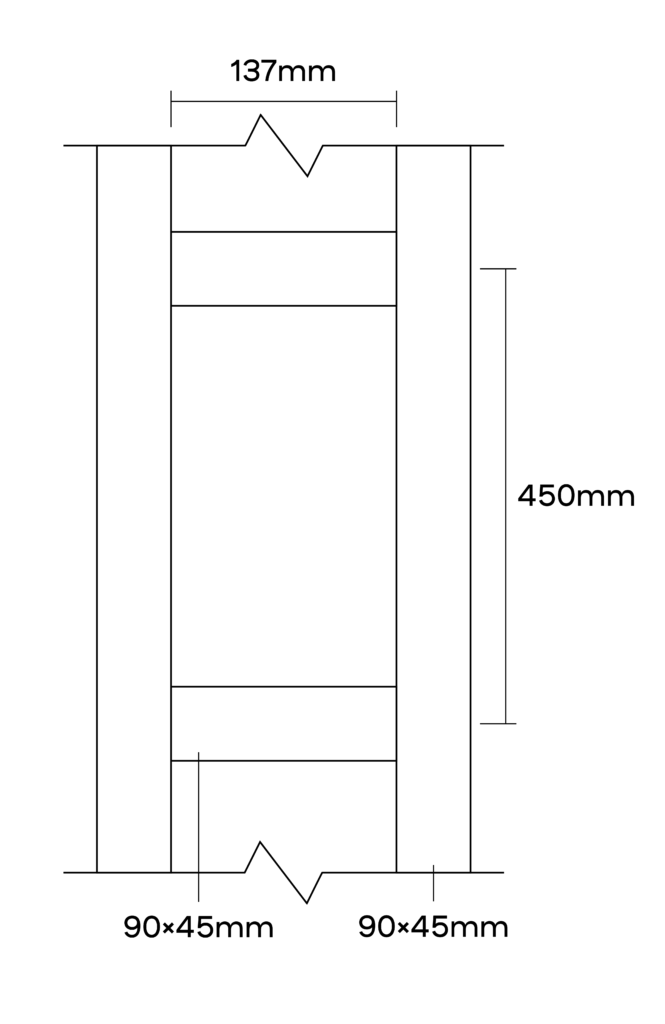
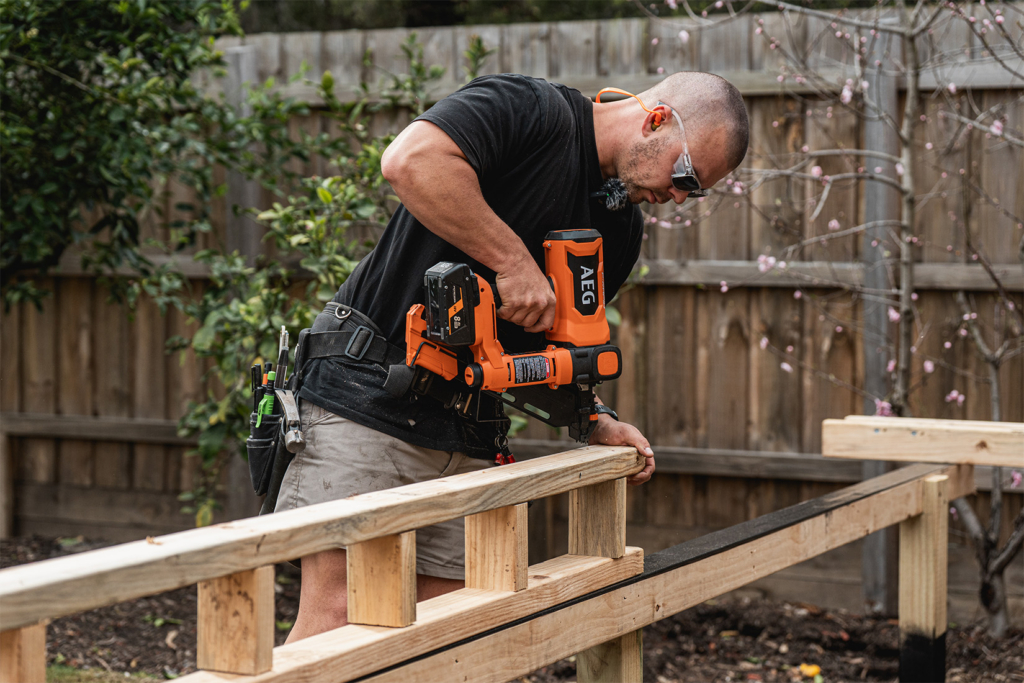
Nail and screw the noggins and joist together, spaced out at your joist span required by your decking selection, then install onto the bearers where the breaker boards will go.

Step 11: Install Joists
With the bearers in place, you’re ready to install the joists.
For this project, we used 90x45mm treated pine for the joists.
Measure and work out your joist centres, then cut an offcut of your 90x45mm treated pine to the required joist centres.
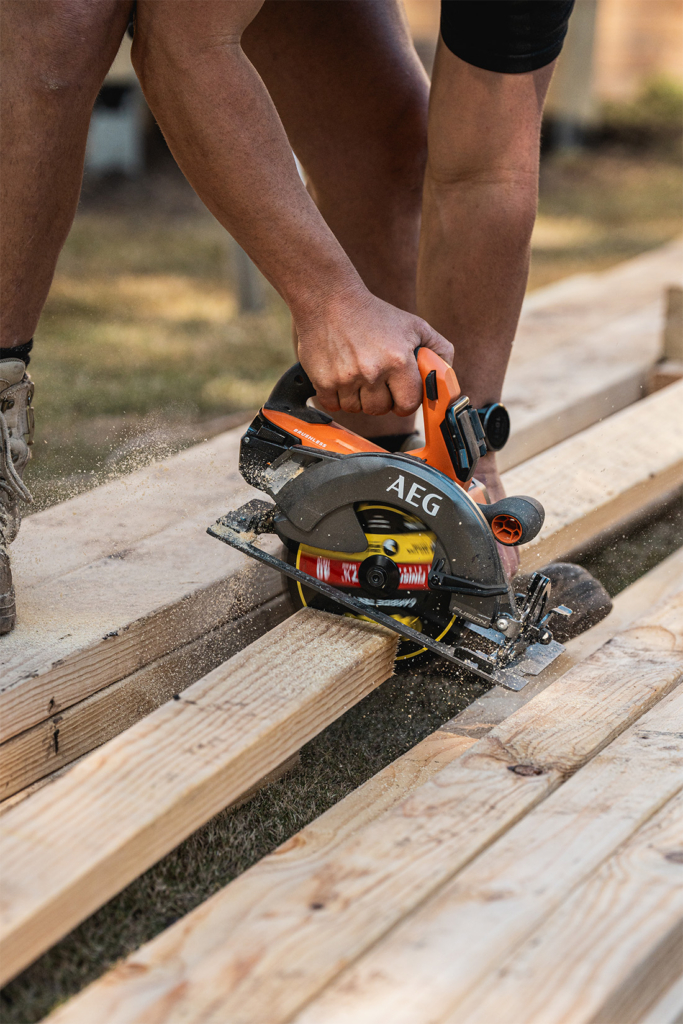
Always refer to the installation requirements for your specific Ekodeck range when determining maximum joist centres. Different decking profiles and applications may have different requirements.
Loosely lay out all your joists on the bearers, perpendicular to the direction the Ekodeck decking boards will run.

You can then take your cut down joist span piece of timber and measure out your joist spans, fixing with two nails on each side of the joist as you go along.

You may need to fix some joists with a batten screw as required.

Step 12: Levelling Joists
Before installing any decking, give the entire frame a final check.

Make sure the subframe is square, level and structurally secure. Check that joist spacing meets the requirements of your chosen Ekodeck product and confirm that there is adequate support everywhere a board will need to be fixed.
This is also the time to correct any joists sitting slightly higher or lower than the surrounding frame. A consistently flat subframe will help produce a much cleaner finished deck.
You can check this by running a string line across the deck, raising it with a 10mm packer at either end, and then slide another 10mm packer under the string line along each joist.
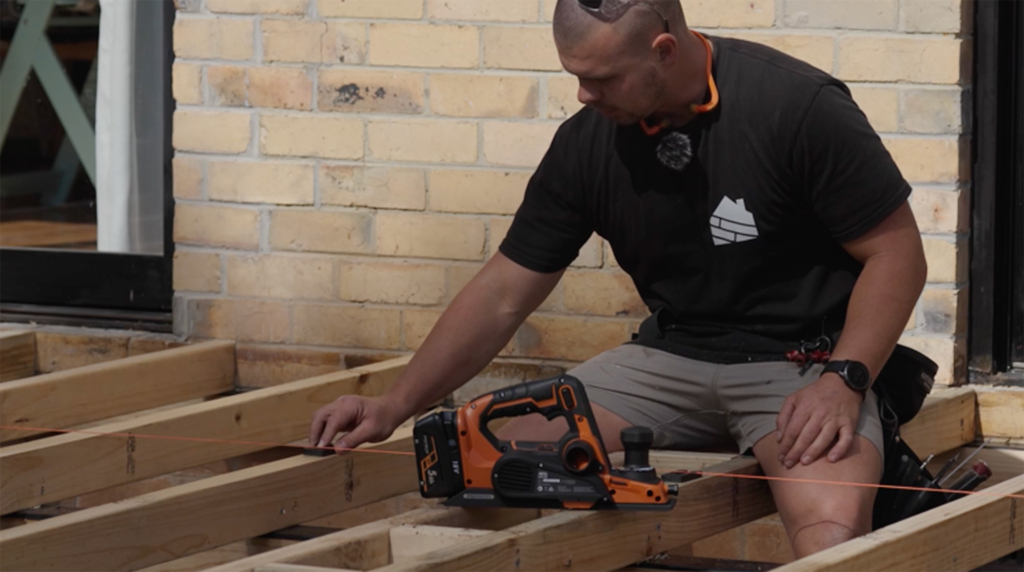
If the packer touches the string line/doesn’t slide under it perfectly, that joist will need to be planed down.

Step 13: Apply Joist Protection Tape
Before laying your Ekodeck boards, apply joist protection tape to the top of the timber joists – we used G-Tape 50mm x 20m Tape.
Joist tape creates a barrier between the decking and timber subframe, helping prevent water from sitting directly on the timber and around fixing penetrations.
Apply the tape continuously along the top of each joist, pressing it firmly into place and keeping the surface as smooth as possible.

Once the joist protection tape is installed, your timber subframe is ready for decking.
Ready for your Ekodeck?
Building a quality deck starts well before the first decking board goes down. Careful planning, accurate measurements and a strong, level subframe provide the foundation you need for a professional-looking result.
With your subframe complete, you’re ready to move on to installing your chosen Ekodeck composite decking.
For product-specific joist spacing, fixing requirements and installation details, always refer to the latest Ekodeck Product Manual for the decking range you’re installing.
You may also like

Get started with Ekodeck
Experience our entire colour range for yourself. We deliver a sample kit complete with each colour direct to your door.